by Anne Clark | Apr 23, 2025 | Business, How To, LinkedIn
1. Sign Up or Log In
Go to www.linkedin.com.
Click Join now and enter your email address and password.
Follow the prompts to add your first and last name.
2. Add a Professional Profile Photo
Choose a clear, high-resolution headshot.
Smile, dress appropriately for your industry, and make sure your face takes up around 60% of the frame.
No pets, party hats, or sunglasses, unless you’re applying to be a rockstar.
3. Write a Compelling Headline
This appears right under your name and is your mini-billboard.
Don’t just use your job title. Use a value-based headline like:
Helping female-led brands build magnetic digital strategies | Digital Marketer | OBM | Podcast Pro
4. Fill Out the “About” Section
This is your personal elevator pitch. Write in the first person.
Mention:
- What you do
- Who you help
- Your mission or values
- A sprinkle of personality
Example:
I’m a spiritual OBM helping female entrepreneurs ditch the tech overwhelm and show up online with soul-aligned strategy. From email marketing to course launches, I turn chaos into clarity.
5. Add Your Work Experience
List your past and current roles, ideally with descriptions.
Use bullet points to highlight achievements, not just tasks.
Include results where possible (e.g., “Grew client’s list by 5K in 3 months”).
6. Add Skills
Choose key skills that match your niche (LinkedIn allows up to 50).
Prioritise the top 3 that reflect how you want to be known.
7. Ask for Recommendations
Reach out to past clients, managers, or colleagues for testimonials.
A good rec = social proof that sells without you saying a word.
8. Add Education & Certifications
Include schools, courses, certifications, and anything relevant to your career story.
Short courses (Mailchimp Academy, Online Marketing, VA Bootcamp)? Include them!
9. Customise Your URL
Go to “Edit public profile & URL” on the right-hand side.
Change your LinkedIn URL to something clean and easy like:
linkedin.com/in/yourname
10. Turn on “Open to Work” or “Open to Opportunities”
If you’re looking for clients or roles, enable this setting.
You can choose to show it to recruiters only or publicly.
11. Add Featured Content
Highlight your best work: PDFs, links, videos, blogs, testimonials, freebies.
This section is PRIME real estate—use it wisely!
12. Follow Relevant People & Companies
Build your network by connecting with peers, thought leaders, and potential clients.
Leave genuine comments on others’ posts to start showing up as a pro in your space.
13. Start Posting
Share a mix of:
-
Tips and value-based posts
-
Personal stories with lessons
-
Behind-the-scenes of your biz
-
Client wins and results
Tips:
-
Post at least 1-2 times per week to stay visible.
-
Keep your profile updated as your business or job changes.
-
Use a branded banner image at the top of your profile.

by Anne Clark | Sep 19, 2023 | Business, Creative, How To
Welcome to the ultimate Canva tutorial for beginners! Designing like a pro has never been easier with Canva, the popular graphic design platform that empowers anyone to create stunning visuals. Whether you’re a business owner, marketer, student, or simply someone looking to enhance their design skills, this comprehensive tutorial will take you from novice to expert in no time.
In this tutorial, we will guide you through the various features and tools of Canva, providing step-by-step instructions and insider tips to help you create professional designs that captivate your audience. From choosing the right templates to mastering the art of typography, we’ve got you covered.
With Canva’s intuitive interface and expansive library of design elements, you’ll discover endless possibilities for creating eye-catching graphics, social media posts, presentations, and more. No design experience? No problem! Our tutorial is designed to make the learning process fun and accessible for everyone.
Join us as we unlock the secrets of designing like a pro with Canva. Get ready to unleash your creativity and bring your ideas to life in a visually stunning way. Let’s dive in and start designing like a pro with Canva!
Why use Canva for design?
Canva is a powerful and user-friendly graphic design tool that allows you to create professional-looking designs without any prior experience or technical skills. Whether you’re a business owner, marketer, or student, Canva is the go-to platform for all your design needs. Here are some reasons why you should use Canva for your design projects:
User-friendly interface
Canva’s interface is designed to be intuitive and user-friendly, making it easy for anyone to create professional-looking designs without any prior experience or technical skills. The drag-and-drop interface makes it easy to add and manipulate design elements, while the toolbar provides quick access to all the tools and features you need.
Expansive library of design elements
Canva has a vast library of design elements, including templates, graphics, photos, and fonts, that you can use to create stunning designs. With Canva’s library, you don’t need to spend time searching for the right images or graphics for your design – everything you need is right at your fingertips.
Collaboration and team projects
Canva allows you to collaborate with team members on design projects, making it easy to work together and share ideas. You can invite team members to view and edit your designs, and Canva also provides a comments feature that allows you to give feedback and make suggestions.
Canva features and tools
Canva offers a wide range of features and tools that allow you to create professional-looking designs in minutes. Here are some of the key features and tools you need to know:
Templates
Canva’s templates are pre-designed layouts that you can use as a starting point for your design. There are templates available for a wide range of design projects, including social media graphics, presentations, posters, flyers, and more. You can choose a template that fits your design needs and customize it to make it your own.
Graphics
Canva has a vast library of graphics that you can use to enhance your designs. These graphics include icons, illustrations, shapes, and more. You can browse through the library and choose the graphics that best fit your design needs, and then customize them to match your branding and style.
Photos
Canva’s photo library includes millions of high-quality images that you can use in your designs. You can search for specific images by keyword or browse through the different categories to find the perfect image for your design. Once you’ve found the right image, you can customize it using Canva’s editing tools.
Text
Canva’s text editing tools allow you to add and customize text in your designs. You can choose from a wide range of fonts and styles, and then adjust the size, color, and spacing to make your text stand out. Canva also offers a range of text effects, such as drop shadows and outlines, that you can use to make your text more visually appealing.
Canva design tips and best practices
To create professional-looking designs with Canva, it’s essential to follow some design tips and best practices. Here are some tips to help you get started:
Keep it simple
When it comes to design, less is often more. Simplify your design by removing any unnecessary elements and focusing on the key message you want to convey. Use white space to create a clean and uncluttered design that is easy to read and understand.
Use colour wisely
Colour is a powerful tool in design, but it can also be overwhelming if not used correctly. Choose a colour palette that complements your branding and use it consistently throughout your design. Use contrasting colours to make important elements stand out and avoid using too many different colours in one design.
Choose the right font
The font you choose can have a significant impact on the overall look and feel of your design. Choose a font that is easy to read and complements your branding. Use different font sizes and styles to create a hierarchy of information and make important elements stand out.
Creating professional social media graphics with Canva
Social media is a powerful tool for businesses and individuals to connect with their audience. With Canva, you can create professional-looking social media graphics that help you stand out from the crowd. Here are some tips for creating social media graphics with Canva:
Use the right dimensions
Each social media platform has its own recommended dimensions for images and graphics. Make sure you use the right dimensions for each platform to ensure that your graphics look professional and are optimized for each platform.
Be consistent with branding
When creating social media graphics, it’s essential to be consistent with your branding. Use your brand colours, fonts, and style to create graphics that are instantly recognizable and reinforce your brand message.
Use eye-catching visuals
Social media is a visual platform, so it’s essential to use eye-catching visuals in your graphics. Use high-quality images and graphics that grab the attention of your audience and make them want to engage with your content.
Designing eye-catching presentations with Canva
Presentations are a powerful tool for businesses, students, and individuals to share information and ideas. With Canva, you can create professional-looking presentations that captivate your audience. Here are some tips for designing eye-catching presentations with Canva:
Use the right template
Canva offers a wide range of presentation templates that you can use as a starting point for your design. Choose a template that fits your content and customize it to make it your own.
Use visuals to enhance your message
Visuals are a powerful tool in presentations, as they help to break up text and make your message more engaging. Use images, graphics, and charts to illustrate your points and make your presentation more visually appealing.
Keep it simple and concise
When it comes to presentations, less is often more. Keep your slides simple and concise, with a clear message on each slide. Use bullet points and short sentences to make your content easy to read and understand.
Designing stunning infographics with Canva
Infographics are a popular way to present complex information in a visually appealing way. With Canva, you can create stunning infographics that help you communicate your message effectively. Here are some tips for designing infographics with Canva:
Choose a compelling topic
The topic of your infographic should be compelling and relevant to your audience. Choose a topic that is interesting and informative, and that can be presented visually.
Use data to support your message
Infographics are often used to present data and statistics in a visually appealing way. Use data to support your message and make your infographic more informative and engaging.
Use visuals to tell a story
Infographics should tell a story and take the reader on a journey. Use visuals, such as icons and illustrations, to guide the reader through the information and make it more engaging.
Canva templates and customization options
Canva offers a wide range of templates and customization options that allow you to create professional-looking designs in minutes. Here are some of the customization options you need to know:
Customizing templates
Canva’s templates are designed to be customizable, allowing you to make them your own. You can change the colours, fonts, and images to match your branding and style, and add your own text and graphics to make the template unique.
Creating custom designs
Canva also allows you to create custom designs from scratch. You can choose the dimensions of your design, add your own images and graphics, and customize the text and colors to create a unique design that meets your needs.
Branding kit
Canva’s branding kit allows you to save your brand colors, fonts, and logos, making it easy to apply them consistently across all your designs. With the branding kit, you can create professional-looking designs that are instantly recognizable as part of your brand.
Canva for collaboration and team projects
Canva is not just a design tool – it’s also a powerful collaboration tool that allows you to work with team members on design projects. Here are some of the collaboration features you need to know:
Sharing designs
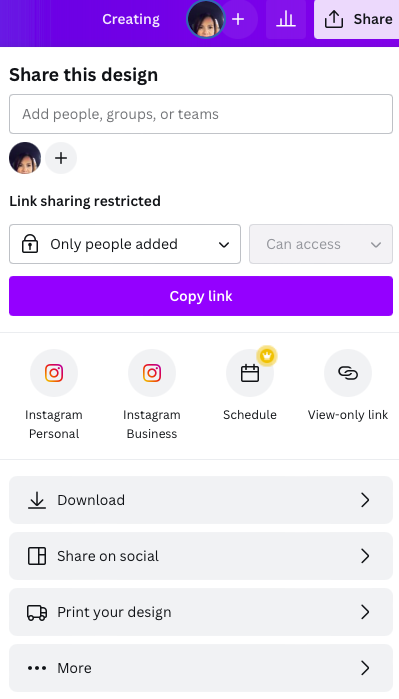
Canva allows you to share your designs with team members, making it easy to collaborate and share ideas. You can invite team members to view and edit your designs, and Canva also provides a comments feature that allows you to give feedback and make suggestions.
Assigning roles and permissions
Canva allows you to assign roles and permissions to team members, giving you control over who can edit and view your designs. You can choose from different roles, such as editor or viewer, and assign permissions accordingly.
Team templates
Canva also allows you to create team templates, which are pre-designed layouts that can be used by team members to create consistent designs. Team templates can be customized to match your branding and style, and can be shared with team members for easy access.
Your next steps
Congratulations, you’ve completed the ultimate Canva tutorial for beginners! You now have the skills and knowledge you need to create professional-looking designs with Canva. Whether you’re creating social media graphics, presentations, infographics, or any other type of design, Canva has everything you need to bring your ideas to life.
To continue your learning journey, explore Canva’s vast library of design elements and experiment with different templates and customization options. And remember, the key to designing like a pro is practice – so keep designing and have fun!


