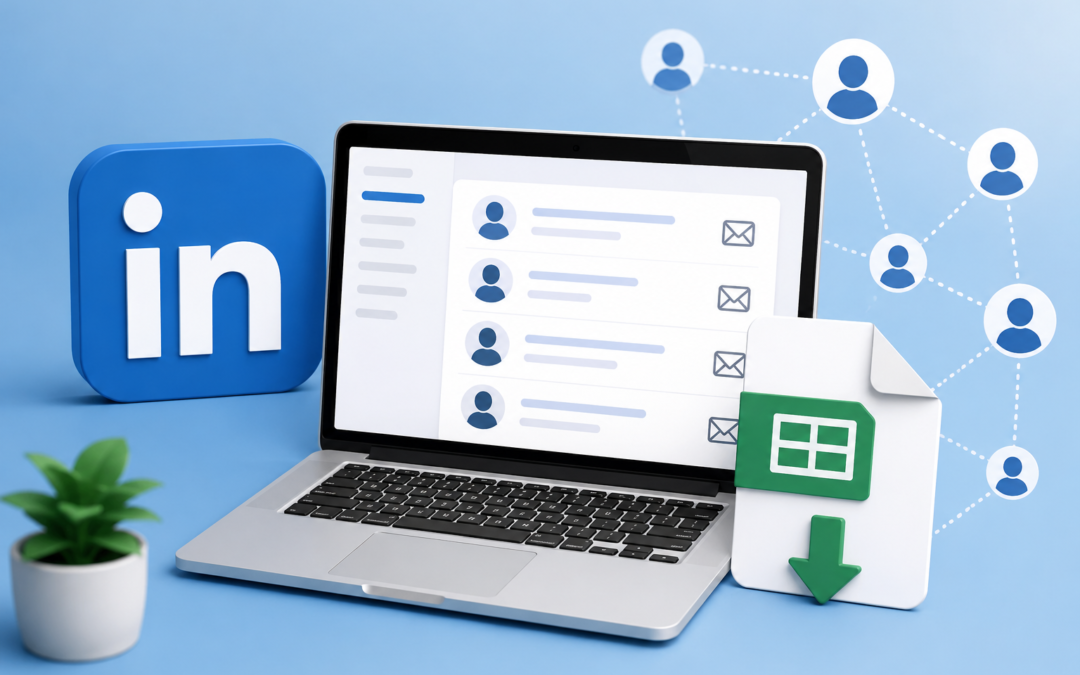
How to Export Your LinkedIn Connections and Email Addresses

How to Export Your LinkedIn Connections and Email Addresses

If you're building your professional network, moving contacts into a CRM, or simply want to keep a backup of your LinkedIn connections, exporting your LinkedIn data can be incredibly useful.

The slightly frustrating part? LinkedIn doesn't exactly make the option obvious.

You may search through My Network, Connections, and Settings, looking for an "Export Contacts" button that simply isn't there. Fortunately, there is a straightforward way to download your LinkedIn connections using LinkedIn's data archive.

Here's how to do it.

Can You Export Email Addresses From LinkedIn?

Yes, but there is an important catch.

When you export your LinkedIn connections, LinkedIn may include information such as:

  • First name
  • Last name
  • Company
  • Position
  • LinkedIn profile URL
  • Connection date
  • Email address, where available

However, you will not necessarily receive the email address for every LinkedIn connection.

The email addresses included in your export depend on the information LinkedIn makes available to you and each connection's privacy settings. So, expect some blank email fields in your spreadsheet.

How to Export Your LinkedIn Connections

The easiest method is to request a larger archive of your LinkedIn data.

Step 1: Go to LinkedIn's Download Your Data Page

While logged into your LinkedIn account on a desktop computer, go to:

LinkedIn Download Your Data

Step 2: Select the Larger Data Archive

You may see an option that allows you to choose specific information to download.

However, if you can't find an option specifically labelled Connections, look for:

Download larger data archive, including connections, verifications, contacts, account history and information we infer about you based on your profile and activity.

This was the option that worked for me.

Select this option and click Request archive.

Step 3: Wait for LinkedIn to Prepare Your Download

LinkedIn will prepare your data and send you an email when your archive is ready to download.

Depending on the size of your LinkedIn account and the amount of data requested, this may take a little time.

Once you receive the email, follow the link to download your archive.

Step 4: Download and Unzip the File

Your LinkedIn data will usually download as a ZIP file.

Simply:

  1. Locate the downloaded ZIP file.
  2. Double-click it to unzip the folder.
  3. Open the extracted folder.
  4. Look for the CSV file containing your connections.

You can open a CSV file using Microsoft Excel, Google Sheets, Apple Numbers or another spreadsheet program.

How to Find the Email Addresses

Once you've opened your connections file, look for the Email Address column.

You may find that:

  • Some contacts have an email address.
  • Some email address fields are blank.
  • Some connections only include their LinkedIn profile information.

This is completely normal.

LinkedIn does not provide unrestricted access to the personal email addresses of everyone you are connected with.

What Can You Do With Your Exported LinkedIn Contacts?

Once you have your CSV file, you can use it to:

  • Import contacts into your CRM.
  • Create a backup of your professional network.
  • Review your connections by company or job title.
  • Identify potential clients or referral partners.
  • Organise your professional network.
  • Clean and segment your contact database.

If you're planning to import contacts into an email marketing platform such as Mailchimp, Buzzlink or another system, take a moment to clean the data first.

Important: Don't Just Upload Everyone to Your Email List

This is where you need to be careful.

Just because someone is a LinkedIn connection does not automatically mean they have given you permission to add them to your marketing email list.

Before importing contacts into an email marketing platform, make sure you have the appropriate consent and that your email practices comply with relevant privacy and spam laws.

A better approach may be to use your LinkedIn export to identify existing contacts and then invite them to subscribe through a proper opt-in form.

That keeps your email list cleaner, more engaged and far less likely to cause problems with your email platform. Nobody wants to build a list only to have Mailchimp immediately give them the side-eye.

Just remember

LinkedIn has made exporting your connections a little less straightforward than it used to be, particularly if you're looking for a simple Export Contacts button.

The method that worked for me was requesting the larger LinkedIn data archive, which includes your connections and contacts.

Once downloaded, you can review your CSV file, organise your network and use the information to better manage your business relationships.

Just remember that not every LinkedIn connection will have an email address available, and an exported email address should not automatically be added to a marketing list without the appropriate permission.


How to set up a LinkedIn Profile

How to set up a LinkedIn Profile

1. Sign Up or Log In

Go to www.linkedin.com.

Click Join now and enter your email address and password.

Follow the prompts to add your first and last name.

2. Add a Professional Profile Photo

Choose a clear, high-resolution headshot.

Smile, dress appropriately for your industry, and make sure your face takes up around 60% of the frame.

No pets, party hats, or sunglasses, unless you’re applying to be a rockstar.

3. Write a Compelling Headline

This appears right under your name and is your mini-billboard.

Don’t just use your job title. Use a value-based headline like:

Helping female-led brands build magnetic digital strategies | Digital Marketer | OBM | Podcast Pro

4. Fill Out the “About” Section

This is your personal elevator pitch. Write in the first person.

Mention:

  • What you do
  • Who you help
  • Your mission or values
  • A sprinkle of personality

Example:

I’m a spiritual OBM helping female entrepreneurs ditch the tech overwhelm and show up online with soul-aligned strategy. From email marketing to course launches, I turn chaos into clarity.

5. Add Your Work Experience

List your past and current roles, ideally with descriptions.

Use bullet points to highlight achievements, not just tasks.

Include results where possible (e.g., “Grew client’s list by 5K in 3 months”).

6. Add Skills

Choose key skills that match your niche (LinkedIn allows up to 50).

Prioritise the top 3 that reflect how you want to be known.

7. Ask for Recommendations

Reach out to past clients, managers, or colleagues for testimonials.

A good rec = social proof that sells without you saying a word.

8. Add Education & Certifications

Include schools, courses, certifications, and anything relevant to your career story.

Short courses (Mailchimp Academy, Online Marketing, VA Bootcamp)? Include them!

9. Customise Your URL

Go to “Edit public profile & URL” on the right-hand side.

Change your LinkedIn URL to something clean and easy like:

linkedin.com/in/yourname

10. Turn on “Open to Work” or “Open to Opportunities”

If you’re looking for clients or roles, enable this setting.

You can choose to show it to recruiters only or publicly.

11. Add Featured Content

Highlight your best work: PDFs, links, videos, blogs, testimonials, freebies.

This section is PRIME real estate—use it wisely!

12. Follow Relevant People & Companies

Build your network by connecting with peers, thought leaders, and potential clients.

Leave genuine comments on others’ posts to start showing up as a pro in your space.

13. Start Posting

Share a mix of:

  • Tips and value-based posts

  • Personal stories with lessons

  • Behind-the-scenes of your biz

  • Client wins and results


Tips:

  • Post at least 1-2 times per week to stay visible.

  • Keep your profile updated as your business or job changes.

  • Use a branded banner image at the top of your profile.

How to Set Up and Grow Your LinkedIn Newsletter

How to Set Up and Grow Your LinkedIn Newsletter

LinkedIn newsletters are a powerful tool for professionals looking to establish authority in their industry, share insights, and stay connected with their audience. Here’s a step-by-step guide on how to set up a LinkedIn Newsletter and tips to effectively grow your audience.

Setting Up Your LinkedIn Newsletter

Step 1: Check Eligibility

Before you can start a newsletter, you need to have access to LinkedIn’s publishing platform. This feature is available to users who meet specific criteria, such as having a history of content creation or a certain number of connections. Ensure you meet these prerequisites to access the newsletter feature.

Step 2: Activate the Newsletter Feature

  • Go to your LinkedIn homepage and navigate to the ‘Write an Article’ section.
  • If you are eligible, you’ll see an option to ‘Create a newsletter’.
  • Click on it, and you’ll be prompted to fill in details about your newsletter.

Step 3: Define Your Newsletter

  • Name: Choose a catchy and relevant name that reflects the content and purpose of your newsletter.
  • Description: Write a concise description that highlights the value your newsletter offers to subscribers.
  • Publishing Cadence: Decide how often you’ll publish. It could be weekly, biweekly, or monthly. Consistency is key to keeping your audience engaged.

Step 4: Design Your First Edition

  • Create compelling content that provides value to your readers. Whether it’s industry insights, professional tips, or career advice, ensure that your content resonates with your target audience.
  • Add relevant images, videos, and links to enhance your message and engage readers.

Step 5: Publish and Promote

  • Once you’re satisfied with your content, hit publish.
  • Promote your newsletter on your LinkedIn profile, status updates, and other social media platforms to increase visibility.

Tips to Grow Your LinkedIn Newsletter Audience

1. Leverage Your Existing Network Encourage your LinkedIn connections to subscribe by sharing your newsletter in your posts and status updates. Personal messages to select connections who might benefit from your newsletter can also be effective.

2. Engage with Your Audience Interaction is crucial. Respond to comments, questions, and feedback on your newsletters. Engaging with your readers builds a community and fosters loyalty.

3. Collaborate with Other Professionals Feature guest posts from other industry professionals or mention their work in your newsletter. They are likely to share your content with their audience, which can increase your visibility and subscriber count.

4. Utilise LinkedIn Groups Share your newsletter in relevant LinkedIn groups (always follow the group’s guidelines). This can introduce your content to a highly targeted audience interested in your topic.

5. Optimise for Search Use relevant keywords in your newsletter title and description to make it searchable on LinkedIn and beyond. This SEO practice helps in attracting organic traffic to your newsletter.

6. Consistency Is Key Maintain a regular publishing schedule. Consistent posting keeps your audience engaged and helps build anticipation for your next edition.

7. Offer Exclusive Content Provide content that is exclusive to your newsletter subscribers to make them feel valued. This could include in-depth analyses, downloadable resources, or early access to your events or services.

8. Monitor Analytics LinkedIn provides analytics for newsletters, which include data on views, engagement, and subscriber demographics. Use this information to refine your content strategy and better cater to your audience’s interests.

Creating and growing a LinkedIn newsletter takes time and dedication, but with the right approach, it can significantly enhance your professional brand and broaden your network. Start today, and with persistence, you’ll see your efforts pay off!