by Anne Clark | May 20, 2025 | Business, Digital Marketing, Online Business Manager
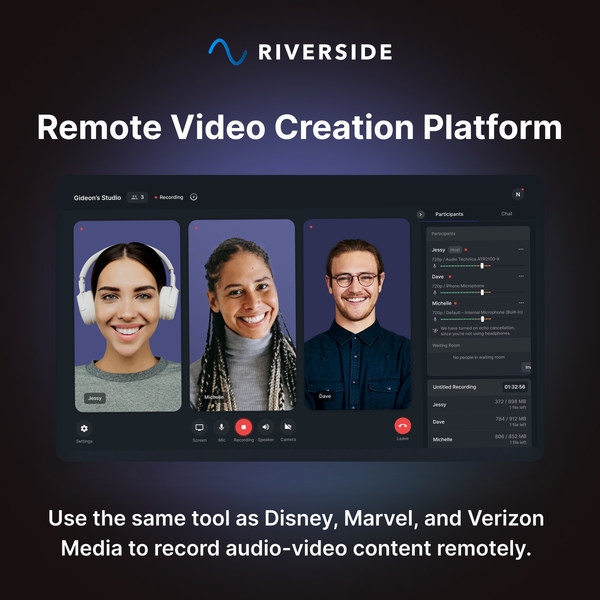
If you’re recording long-form video content for YouTube, a web TV show, or your signature series, you’re sitting on a content goldmine. But too many entrepreneurs stop at the upload.
Here’s where I step in.
My specialty is taking that one high-value video and turning it into a powerful, multi-platform content strategy. Without you needing to create anything else from scratch.
This isn’t about doing more—it’s about making what you’ve already created work harder.
Turning One Video into Everything You Need
Here’s how it works:
1. Audio Becomes a Podcast
Once your video is recorded, I extract the audio, clean it up, and add your professional intro and outro. You’ve now got a podcast episode ready to upload to Spotify, Apple Podcasts, and more. It’s a seamless way to expand your reach without any extra effort on your end.
2. Reels and Snippets for Social Media
I scan the video for standout moments and turn them into short, branded reels with captions and headings. These clips are built for impact, tailored to platforms like Instagram, Facebook, LinkedIn and TikTok.
3. Blog Posts From Transcripts
Using the video transcript, I create polished, SEO-optimised blog articles that capture your message and tone. These aren’t robotic rewrites—they’re high-quality pieces that reinforce your expertise and improve your Google ranking.
4. Email Newsletters That Engage
Each video is a story waiting to be told to your list. I distil the key themes into a newsletter article that keeps your subscribers engaged and drives them back to your offers, website or podcast.
5. LinkedIn Articles That Build Authority
For clients looking to grow a presence on LinkedIn, I convert your video insights into a thoughtful, structured article that positions you as a thought leader.
6. Social Posts and Carousels
From your original video, I generate bite-sized takeaways, quotes, and educational posts that translate beautifully into static images, carousel slides, and captions for your broader content plan.
It Doesn’t End There
Three to six months later, I revisit your original content and recreate new versions—tweaked headlines, different visuals, updated angles—so your best material continues to show up without repeating itself. This long-term content recycling strategy keeps your platforms active and relevant.
Why This Works
Your video is packed with value – but without repurposing, most of that value disappears the moment it’s uploaded.
By turning one piece of content into many, we:
-
Save time
-
Maintain consistency across channels
-
Reach your audience wherever they are
-
Maximise the ROI of every video you record
Ready to Make Your Video Content Work Harder?
If you’re investing in video for your YouTube channel or TV show, I can help you transform that single effort into weeks of content across multiple platforms. You stay in your zone of genius—I’ll take care of the rest.

by Anne Clark | Apr 23, 2025 | Business, How To, LinkedIn
1. Sign Up or Log In
Go to www.linkedin.com.
Click Join now and enter your email address and password.
Follow the prompts to add your first and last name.
2. Add a Professional Profile Photo
Choose a clear, high-resolution headshot.
Smile, dress appropriately for your industry, and make sure your face takes up around 60% of the frame.
No pets, party hats, or sunglasses, unless you’re applying to be a rockstar.
3. Write a Compelling Headline
This appears right under your name and is your mini-billboard.
Don’t just use your job title. Use a value-based headline like:
Helping female-led brands build magnetic digital strategies | Digital Marketer | OBM | Podcast Pro
4. Fill Out the “About” Section
This is your personal elevator pitch. Write in the first person.
Mention:
- What you do
- Who you help
- Your mission or values
- A sprinkle of personality
Example:
I’m a spiritual OBM helping female entrepreneurs ditch the tech overwhelm and show up online with soul-aligned strategy. From email marketing to course launches, I turn chaos into clarity.
5. Add Your Work Experience
List your past and current roles, ideally with descriptions.
Use bullet points to highlight achievements, not just tasks.
Include results where possible (e.g., “Grew client’s list by 5K in 3 months”).
6. Add Skills
Choose key skills that match your niche (LinkedIn allows up to 50).
Prioritise the top 3 that reflect how you want to be known.
7. Ask for Recommendations
Reach out to past clients, managers, or colleagues for testimonials.
A good rec = social proof that sells without you saying a word.
8. Add Education & Certifications
Include schools, courses, certifications, and anything relevant to your career story.
Short courses (Mailchimp Academy, Online Marketing, VA Bootcamp)? Include them!
9. Customise Your URL
Go to “Edit public profile & URL” on the right-hand side.
Change your LinkedIn URL to something clean and easy like:
linkedin.com/in/yourname
10. Turn on “Open to Work” or “Open to Opportunities”
If you’re looking for clients or roles, enable this setting.
You can choose to show it to recruiters only or publicly.
11. Add Featured Content
Highlight your best work: PDFs, links, videos, blogs, testimonials, freebies.
This section is PRIME real estate—use it wisely!
12. Follow Relevant People & Companies
Build your network by connecting with peers, thought leaders, and potential clients.
Leave genuine comments on others’ posts to start showing up as a pro in your space.
13. Start Posting
Share a mix of:
-
Tips and value-based posts
-
Personal stories with lessons
-
Behind-the-scenes of your biz
-
Client wins and results
Tips:
-
Post at least 1-2 times per week to stay visible.
-
Keep your profile updated as your business or job changes.
-
Use a branded banner image at the top of your profile.

by Anne Clark | Aug 26, 2024 | Business, Digital Marketing, LinkedIn
LinkedIn newsletters are a powerful tool for professionals looking to establish authority in their industry, share insights, and stay connected with their audience. Here’s a step-by-step guide on how to set up a LinkedIn Newsletter and tips to effectively grow your audience.
Setting Up Your LinkedIn Newsletter
Step 1: Check Eligibility
Before you can start a newsletter, you need to have access to LinkedIn’s publishing platform. This feature is available to users who meet specific criteria, such as having a history of content creation or a certain number of connections. Ensure you meet these prerequisites to access the newsletter feature.
Step 2: Activate the Newsletter Feature
- Go to your LinkedIn homepage and navigate to the ‘Write an Article’ section.
- If you are eligible, you’ll see an option to ‘Create a newsletter’.
- Click on it, and you’ll be prompted to fill in details about your newsletter.
Step 3: Define Your Newsletter
- Name: Choose a catchy and relevant name that reflects the content and purpose of your newsletter.
- Description: Write a concise description that highlights the value your newsletter offers to subscribers.
- Publishing Cadence: Decide how often you’ll publish. It could be weekly, biweekly, or monthly. Consistency is key to keeping your audience engaged.
Step 4: Design Your First Edition
- Create compelling content that provides value to your readers. Whether it’s industry insights, professional tips, or career advice, ensure that your content resonates with your target audience.
- Add relevant images, videos, and links to enhance your message and engage readers.
Step 5: Publish and Promote
- Once you’re satisfied with your content, hit publish.
- Promote your newsletter on your LinkedIn profile, status updates, and other social media platforms to increase visibility.
Tips to Grow Your LinkedIn Newsletter Audience
1. Leverage Your Existing Network Encourage your LinkedIn connections to subscribe by sharing your newsletter in your posts and status updates. Personal messages to select connections who might benefit from your newsletter can also be effective.
2. Engage with Your Audience Interaction is crucial. Respond to comments, questions, and feedback on your newsletters. Engaging with your readers builds a community and fosters loyalty.
3. Collaborate with Other Professionals Feature guest posts from other industry professionals or mention their work in your newsletter. They are likely to share your content with their audience, which can increase your visibility and subscriber count.
4. Utilise LinkedIn Groups Share your newsletter in relevant LinkedIn groups (always follow the group’s guidelines). This can introduce your content to a highly targeted audience interested in your topic.
5. Optimise for Search Use relevant keywords in your newsletter title and description to make it searchable on LinkedIn and beyond. This SEO practice helps in attracting organic traffic to your newsletter.
6. Consistency Is Key Maintain a regular publishing schedule. Consistent posting keeps your audience engaged and helps build anticipation for your next edition.
7. Offer Exclusive Content Provide content that is exclusive to your newsletter subscribers to make them feel valued. This could include in-depth analyses, downloadable resources, or early access to your events or services.
8. Monitor Analytics LinkedIn provides analytics for newsletters, which include data on views, engagement, and subscriber demographics. Use this information to refine your content strategy and better cater to your audience’s interests.
Creating and growing a LinkedIn newsletter takes time and dedication, but with the right approach, it can significantly enhance your professional brand and broaden your network. Start today, and with persistence, you’ll see your efforts pay off!

by Anne Clark | Jan 11, 2022 | Business, How To
Linkedin introduced in 2021 a new great function to create a newsletter to connect regularly with your target market and connections. In this article, I am going to step you through what to do and how to create a LinkedIn Newsletter.
Before you start crafting your newsletter, you need to activate your account to creative mode.
Setting your profile to creator mode
To activate your profile to Creator Mode.
To do this simply,
- Log in to your LinkedIn profile
- Click on your profile
- Scroll down to the Resources section
- You will see Creator Mode as the first option, click this to ON.
Setting up your Newsletter
Newsletters are created in LinkedIn via your Write Article post options.
When you are creating it the first time, you will need to set up your Newsletter first.
To do this,
- Go to your profile overview feed
- Click on Write Article
- You will see a button called ‘Create Newsletter’, click this button
- Create your Newsletter title (please note you can change this at any time)
- Select how often you will publish your newsletter.
- Add your newsletter description
- Upload an image for your newsletter (would recommend profile headshot for better audience connection)
- Make sure have ticked the box for Invite my connections and followers to subscribe, and
- Make sure you have ticked the box Subscribe me to my newsletter.
Writing your content
Now that your newsletter is set up, you can start writing your content. This is done through the Write article feature.
Now that your newsletter is set up, you can start writing your content. This is done through the Write article feature.
If you need to change your Newsletter name or image, when you click into the Write article section, you will see an editing pen and word so you can make the edits there.
Simply write your article as you desire. You can add images and also links.
Once completed, click Publish.
Alternating between your Articles and Newsletter feature
Now that you have set up your newsletter, does not mean you can’t write individual articles. When you go into your Write article section, you will see a button next to publish the will show your newsletter name, when you click it you can see a dropdown menu to select either ‘create an individual article’ or ‘newsletter’.
What happens after you publish?
Once you publish your newsletter, connections and followers will receive and notification of an invitation to subscribe. This is found under the Network section (same place as invitations to connect with people received). They will also be given the option to subscribe to your newsletter.
For clients I have helped launch their newsletters, we have hit over 100 subscribers in less than 1 day.
Need help?
Whether you are digitally challenged, or simply time-poor, please feel free to contact me to see how I can support you.