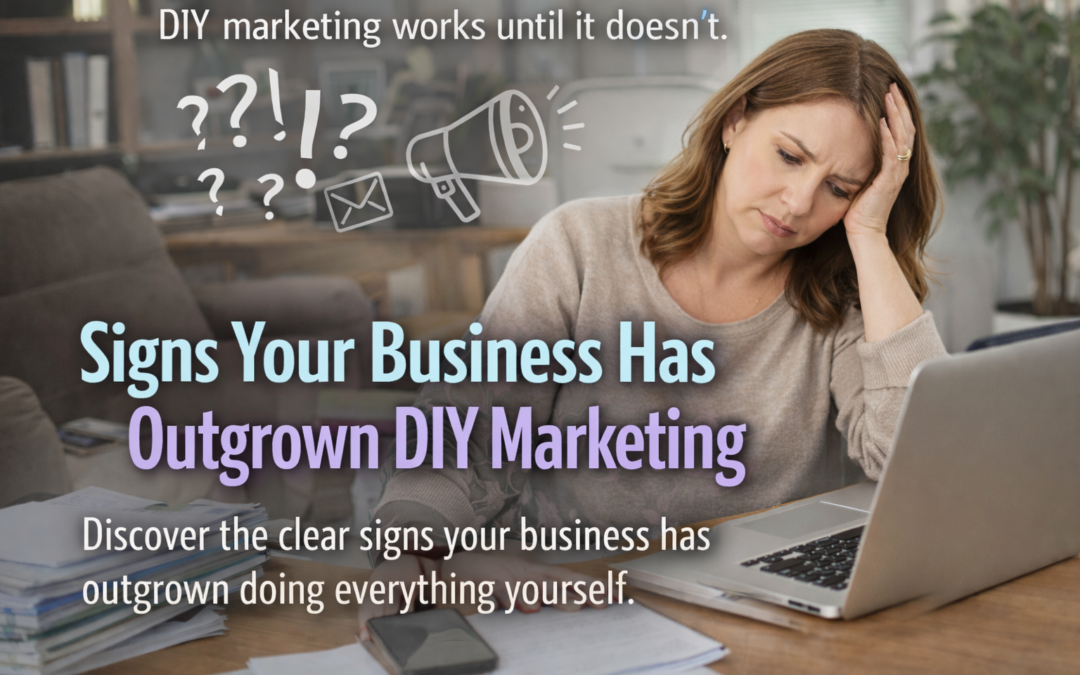
Content Creation Hacks for Busy Entrepreneurs

Content Creation Hacks for Busy Entrepreneurs

Understanding content creation is crucial for businesses aiming to build their brand and engage with their audience. However, the demands of running a business often leave little time for consistently producing engaging material. This article is designed to help you optimise your content creation process across multiple platforms effectively. It delves into strategies, tools, and workflows to streamline your approach.

Strategies for Effective Content Creation

Producing content efficiently requires a systematic approach. Here’s how to do it effectively:

  • Batch Content Creation: Allocate dedicated time slots to create multiple pieces of content simultaneously. This focused approach enhances productivity and efficiency.
  • Outline for Clarity: Use outlines to organise your thoughts and ensure clear and coherent presentations or writing that are easy to follow.
  • Utilise Templates: Employ pre-designed templates for blog posts, social media updates, and videos to maintain consistency, save time, and enhance visual appeal.
  • Break it Down: Simplify complex topics into digestible chunks to cater to a broader audience with varying attention spans.
  • User-Generated Content: Encourage audience participation and repurpose user-generated content to foster community engagement and reduce the burden of content creation.

Tools & Apps for Streamlining Workflows

Discover essential tools and platforms to simplify your content creation process:

  • Canva: Easily create stunning graphics and visual content using Canva’s intuitive design templates and editing tools.
  • Buffer: Manage and schedule social media posts across multiple platforms from a single dashboard, streamlining your content distribution strategy.
  • Grammarly: Enhance the quality of your written content with real-time grammar and spell-check tools, ensuring accuracy and professionalism.
  • Headliner: Transform audio clips into engaging video content with added images and animations, perfect for social media sharing.
  • Trello: Organise content ideas, schedules, and collaborations using Trello’s visual project management features to maintain a structured and efficient workflow.

Repurposing Content Across Platforms

Learn effective strategies to extend the reach and lifespan of your content:

  • Slide Decks: Convert podcast episodes or blog posts into visually compelling slide presentations for platforms like LinkedIn or SlideShare.
  • Snippet Extraction: Extract key quotes, facts, or insights from longer content pieces to create engaging social media posts, email newsletters, or blog excerpts.
  • Video to Written Content: Transcribe video content into textual blog posts or articles to enhance SEO and appeal to diverse audience preferences.
  • Podcast Highlights: Create short audio snippets paired with striking visuals for impactful social media posts.
  • Content Refresh: Regularly update and refresh older content with fresh information, trends, or insights to maintain relevance and attract new readers.

Crafting Your Content Strategy

Wrap up with practical tips on integrating these strategies into a cohesive content strategy aligned with your business goals. Emphasise the importance of audience engagement, consistency, and high-quality content to drive growth and enhance brand visibility.

For time-strapped business owners implementing these strategies and leveraging recommended tools, optimising content creation processes, saving time, and increasing impact across digital channels becomes achievable. This comprehensive ebook equips entrepreneurs with the tools and strategies necessary to maximise their business potential in today’s competitive digital marketplace.

Why you should GeoTag your Google Business images

Why you should GeoTag your Google Business images

Why you should GeoTag your Google Business images

Geo-tagging your Google Business snaps is a savvy move for any business wanting to up their game online and connect better with local customers. This simple trick can seriously boost your business’s search engine optimisation (SEO), local search rankings, and overall customer engagement down under. In this blog, we’ll have a look at why you should start geo-tagging your Google Business.

1. Boost Local SEO

Geo-tagging snaps can give your local SEO a massive lift. By chucking geographical info on your images, you’re letting search engines know exactly where your business is parked. This makes it a breeze for search engines to show your biz in search results when folks are hunting for products or services in your neck of the woods. As a result, your business becomes more noticeable to potential customers keen on what you’re offering.

2. Enhance Google Maps Visibility

When you geo-tag your business images, these pictures can pop up in Google Maps searches tied to your location. This is a ripper benefit because loads of consumers use Google Maps to find businesses close by. Having actual shots of your business or products gives potential customers a better stickybeak into what to expect, which can be the clincher in choosing your business over the competition.

3. Increase Engagement

Images are ace for engagement. Customers are more likely to have a gander at visual content, and geo-tagged images can add an extra layer of relevance by linking your business to specific locations. This can make your content more engaging and relatable to local customers, leading to more interactions, shares, and even natter about your business.

4. Improve Relevance in Local Searches

Geo-tagging helps make your business more relevant in local searches. When search engines get the gist of where your images and business are located, they can match your biz more accurately with local search queries. This increased relevance can lead to better rankings in search results, making it likelier that local customers will stumble upon your business when they’re on the hunt for products or services you offer.

5. Build Trust with Potential Customers

Geo-tagged images give potential customers the hard evidence that your business is where you reckon it is. This can be a big deal for new or small businesses trying to build trust with customers. By showing real shots of your location, products, or services, you’re giving potential customers a fair dinkum look at your authenticity and transparency.

6. Enhance Content for Social Media

Geo-tagged images aren’t just good for your Google Business profile; they can also spruce up your content across social media platforms. Many social media users are on the lookout for local content, and geo-tagging can make your posts more discoverable to a local audience. This can help boost your social media reach and engagement, further promoting your business.

7. Detailed Insights and Analytics

Lastly, geo-tagging your images can provide valuable insights into how customers interact with your business online. Most platforms offer analytics on how users engage with geo-tagged content, allowing you to see which images get the most eyeballs and where your most engaged audiences are located. This info can be gold for refining your marketing strategies and targeting your efforts more effectively.

Geo-tagging your Google Business snaps is a simple yet powerful way to boost your online presence, connect with local customers, and give your local SEO efforts a leg up. By taking the time to add geographical info to your images, you can improve your visibility in local searches, engage more effectively with potential customers, and snag valuable insights into your audience. Start geo-tagging your snaps today and watch your local business presence grow.

New Email Marketing Changes for Google and Yahoo Starting 1st February 2024

New Email Marketing Changes for Google and Yahoo Starting 1st February 2024

Starting from 1st February 2024, Google and Yahoo will implement new regulations affecting how bulk emails are managed. These changes aim to reduce spam and improve email security and deliverability.

Key Changes:

  1. Bulk Email Threshold:
    • The new regulations specifically target senders of bulk emails, defined as those sending to 5,000 or more recipients.
  2. Spam Management:
    • Senders are required to keep spam complaints below 0.3% to ensure their emails are not flagged as spam.
  3. Email List Hygiene:
    • Only active email addresses should be targeted. Inactive email addresses need to be regularly cleaned from your lists.
  4. Sender Domain Requirements:
    • Emails must be sent from the sender’s own domain (not generic email addresses like Gmail) to enhance sender reputation and improve email branding.

Required Actions:

  1. One-Click Unsubscribe:
    • Include an easy-to-find unsubscribe link in emails, allowing recipients to opt-out effortlessly.
  2. Monitor Spam Rate:
    • Use tools (e.g., Google Postmaster) to monitor and maintain spam complaints below the 0.3% threshold.
  3. Clean Email Lists:
    • Regularly check and remove inactive email addresses to maintain list health and compliance.
  4. Authenticate Sending Domain:
    • Implement SPF, DKIM, and DMARC records for your domain to verify your emails and prevent spoofing. This is crucial for ensuring your emails reach the inbox.

Importance:

  • Compliance with these new rules is essential for maintaining the deliverability of your email marketing campaigns.
  • Even though the threshold is set for bulk emails to 5,000 or more recipients, it’s recommended that all senders, regardless of list size, adhere to these guidelines to avoid potential issues.

By following these guidelines, you can ensure your email marketing efforts remain effective and compliant with the new Google and Yahoo regulations. This not only helps in reducing spam but also in building trust with your audience through responsible email marketing practices.

How to Set Up Your Mailchimp Account: A Step-by-Step Guide

How to Set Up Your Mailchimp Account: A Step-by-Step Guide

How to Set Up Your Mailchimp Account: A Step-by-Step Guide

Setting up a Mailchimp account can open up new avenues for email marketing, allowing you to engage with your audience more effectively. Here’s a detailed, step-by-step guide to help you get started with Mailchimp, from creating an account to sending your first email campaign.

Step 1: Sign Up for a Mailchimp Account

  1. Visit the Mailchimp website: Go to Mailchimp’s homepage.
  2. Click on ‘Sign Up Free’: You’ll find this button on the top right corner of the homepage.
  3. Enter your email, username, and password: Follow the prompts to enter your details. Mailchimp requires a strong password, so be sure to mix upper and lower case letters, numbers, and symbols.
  4. Activate your account: Check your email for a confirmation message from Mailchimp and click the activation link provided.


Step 2: Set Up Your Profile

  1. Fill in your personal information: After activation, complete your profile by providing details like your name and contact information.
  2. Set your time zone: This ensures that your email campaigns are sent according to your local time.
  3. Add your address: Legal requirements necessitate that your physical business address is included in every email footer to comply with anti-spam laws.

Step 3: Create Your Audience

  1. Navigate to the Audience section: This can usually be found in the sidebar menu under ‘Audience’.
  2. Create an audience: If you’re new to Mailchimp, you’ll need to set up your first audience. Enter details such as the audience name and default email address.
  3. Import your contacts: If you already have an email list, you can import it via CSV file, or manually enter subscriber details.

Step 4: Customise Your Email Preferences

  1. Set up your email templates: Go to the ‘Templates’ section and choose from pre-designed templates or create your own.
  2. Personalise your template: Customise your chosen template with your brand’s logo, colours, and fonts to make your emails recognisable to your subscribers.

Step 5: Design Your First Campaign

  1. Go to the Campaigns section: Click ‘Create Campaign’.
  2. Choose your campaign type: Select ‘Email’ and then choose between a regular campaign and an automated one.
  3. Customise your campaign: Add content and design your email. You can use drag-and-drop builders, which are user-friendly even for beginners.

Step 6: Test and Send Your Campaign

  1. Preview and test: Always send a test email to yourself to check the design and content before sending it to your audience.
  2. Schedule or send your campaign: Choose ‘Send Now’ to send your email immediately or ‘Schedule’ to send it at a later time.

Step 7: Analyse the Results

  1. Check your reports: After sending your emails, monitor how they perform. Mailchimp provides detailed reports that include open rates, click rates, and subscriber activity.
  2. Adjust based on feedback: Use the insights from your reports to improve your future email campaigns.


Setting up your Mailchimp account is just the beginning of your email marketing journey. With its comprehensive set of tools and features, Mailchimp not only helps you manage your email lists and campaigns but also provides analytics that can guide your marketing strategies. Remember, the key to successful email marketing is consistency and adaptation based on recipient feedback and engagement metrics.

100 Clickable Subject Lines For Your Newsletter

100 Clickable Subject Lines For Your Newsletter

Are you feeling frustrated that your subscribers aren’t opening your newsletters? Crafting compelling email subject lines can greatly boost open rates. Here are 100 email subject lines to help you capture the attention of your readers:

1. *Exclusive Offer* : Unlock it Inside!
2. Sneak Peek: Tomorrow’s Big Reveal!
3. Missed Our Webinar? Here’s the Replay!
4. An Invitation Just for You, [First Name].
5. Your Personalized Discount Inside.
6. Urgent: Last Chance to Save 50%!
7. Congrats! You’ve Earned a Special Reward.
8. Ready for a Surprise?
9. Breaking News: Product Launch Tomorrow.
10. A Thank You Gift Inside
11. Don’t Open This (Unless You Love Surprises)!
12. Flash Sale: 3 Hours Only!
13. You Asked, We Listened: New Feature Alert!
14. The Ultimate Guide to [Topic] is Here.
15. Hot Off the Press: [Topic/News]
16. Unopened: Your Special Offer is Expiring!
17. Calling All [Profession/Group]! This One’s for You.
18. Secrets of [Industry/Topic] Revealed.
19. Your VIP Access: Behind the Scenes.
20. Let’s Celebrate: Exclusive Event Invite.
21. [First Name], You Won’t Want to Miss This.
22. Last Day: Grab Your Early Bird Discount!
23. Urgent: Update Your Account Info.
24. We Miss You! Come Back with a 20% Off.
25. [Product/Service] is Back in Stock!
26. Introducing Our New [Product/Service].
27. Your Feedback = 15% Off Next Purchase.
28. Just Dropped: [New Collection/Product].
29. Time-Sensitive: Important Account Notice.
30. Your Exclusive First Look Inside.
31. Curious About [Topic]? Find Out More.
32. 24-Hour Flash Deal – Act Fast!
33. Our Gift to You: Free Shipping Today!
34. Your Front-Row Seat Awaits…
35. Can We Get Your Opinion, [First Name]?
36. The Results Are In…
37. Unlock Your Full Potential with [Product/Service].
38. Limited Seats: Reserve Your Spot!
39. Want to Boost Your [Topic]? Here’s How.
40. [Product] Just Got an Upgrade. Check It Out!
41. Did You See This?
42. Meet the Experts: [Event/Date].
43. Your Perfect Match: [Product]!
44. Big News! We’re Expanding.
45. Thanks for Joining! Start with this Special.
46. The Countdown Begins: [Event/Product Launch].
47. [Topic]: Myths vs. Facts.
48. Today Only: Buy One, Get One Free!
49. Say Hello to Our Newest [Product/Service].
50. Your Custom Recommendations Inside.
51. Early Access for Our Top Subscribers.
52. Next Stop: Massive Savings!
53. Discover the Magic of [Product/Feature].
54. Hey [First Name], Did You Forget Something?
55. Attention: Price Drop Alert!
56. Only a Few Left in Stock. Hurry!
57. A Personal Message from [CEO/Influencer Name].
58. Welcome to the Family! Special Inside.
59. Exclusive Webinar: Spots Filling Up!
60. Breaking the Silence on [Topic/Issue].
61. Be the First: Pre-order Now!
62. You’re in Luck! Special Deal Inside.
63. [First Name], This One’s Tailored for You.
64. An Offer Too Good to Refuse.
65. Just for You: Unlock Your Private Deal.
66. Discover What’s Trending Now.
67. Top Picks Just for You.
68. Let’s Set the Record Straight on [Topic].
69. [First Name], Let’s Catch Up!
70. Are You Ready for the Big Day?
71. New Arrivals: Get Them Before They’re Gone!
72. Members Only: Exclusive Access Inside.
73. It’s Official! We’ve Made a Change.
74. Only Hours Left to Save Big.
75. We Saved You a Seat: Join Us!
76. Dive Deep into [Topic].
77. Surprise! Bonus Inside.
78. Top 5 [Industry] Trends to Watch.
79. Need a Little Boost? Check This Out.
80. Your Monthly Dose of Inspiration.
81. Don’t Keep This Secret Offer Waiting.
82. Thank You for Your Loyalty! Here’s a Token.
83. Unleash the Power of [Product/Service].
84. Our Best Sale Yet. Don’t Miss Out!
85. We Thought You’d Like This.
86. Wait! Your Exclusive Offer Inside.
87. Something Special is Coming…
88. Spotlight On: [Product/Service].
89. Join the Revolution: [Product/Service Launch].
90. [First Name], Your Adventure Begins Here.
91. It’s Now or Never: Closing Soon.
92. Hey! You Left Items in Your Cart.
93. Unlock the Secrets of [Topic].
94. A Special Invitation for Our Top Customers.
95. Take a Peek: What’s Inside?
96. Ready to Level Up, [First Name]?
97. This Week’s Must-Have Deals.
98. Your Golden Ticket Awaits.
99. Did You Hear the Buzz?
100. Thanks for Being Awesome! Here’s a Token.

Remember, the effectiveness of an email subject line depends on understanding your audience and the context. It’s essential to test different lines to see which resonates most with your subscribers.

How to determine your Return On Investment (ROI) on your email marketing

How to determine your Return On Investment (ROI) on your email marketing

Calculating the Return on Investment (ROI) for your email marketing campaign involves comparing the revenue generated from the campaign against the costs associated with running it.

Here’s a step-by-step guide to help you determine your ROI for email marketing:

  1. Define Your Goals and Objectives

Start by setting clear goals for your email marketing campaign. Are you aiming to generate direct sales, increase website traffic, gain new subscribers, or achieve some other objective? Clearly define what success looks like for your campaign.

  1. Calculate Costs

Determine all the costs associated with your email marketing campaign. These may include expenses like:

– Email marketing platform or software subscription fees
– Costs of creating email content (copywriting, design, images)
– Costs of any third-party tools or services used (e.g., analytics, automation)
– Staff salaries or contractor fees for campaign planning and execution

  1. Track Revenue

Measure the direct revenue generated as a result of your email marketing campaign. This might include:

– Sales directly attributed to the campaign (tracked through unique promo codes, links)
– Conversions from email subscribers who made a purchase after receiving the email
– Any other revenue-related metrics that align with your campaign goals

  1. Exclude Other Factors

Make sure to exclude any revenue or costs that are not directly related to your email marketing campaign. This helps ensure an accurate ROI calculation.

  1. ROI Calculation

ROI = (Revenue – Costs) / Costs * 100

For example, if your email marketing campaign generated $10,000 in revenue and the total campaign costs were $2,000:

ROI = ($10,000 – $2,000) / $2,000 * 100 = 400%

  1. Interpretation

A positive ROI indicates that your email marketing campaign was profitable. A negative ROI suggests that your campaign costs exceeded the generated revenue. A higher ROI percentage implies a more successful campaign in terms of returns relative to costs.

  1. Consider Other Metrics

While ROI is a crucial metric, it’s also important to consider other performance indicators, such as click-through rate (CTR), conversion rate, open rate, subscriber growth, and customer lifetime value. These metrics provide additional insights into the effectiveness of your campaign beyond just revenue and costs.

  1. Continual Analysis and Improvement

Regularly analyze your email marketing campaign’s performance and adjust your strategies accordingly. Test different subject lines, content formats, send times, and targeting to optimize your results and improve your ROI over time.

  1. Segmentation and Personalization

Utilise segmentation and personalisation techniques to tailor your email content to specific audience segments. This can lead to higher engagement, better conversion rates, and ultimately a higher ROI.

  1. Long-Term Considerations

Remember that email marketing’s impact might extend beyond immediate revenue. Engaged subscribers can become long-term customers, and the branding and relationship-building aspects of email marketing can contribute to customer loyalty and repeat business.

By following these steps and regularly evaluating your email marketing campaign’s performance, you can effectively determine its ROI and make informed decisions to improve your marketing strategies.