by Anne Clark | Sep 20, 2024 | Business, Digital Marketing
FlexClip for Business: The Ultimate Tool for Flexible Editing and Stunning Clips
 When you are a small business and need to create videos, but can’t afford the cost of a videographer at this stage, then I have a great tool for you to check out. FlexClip is your video editing one-stop shop. Allow me to explain.
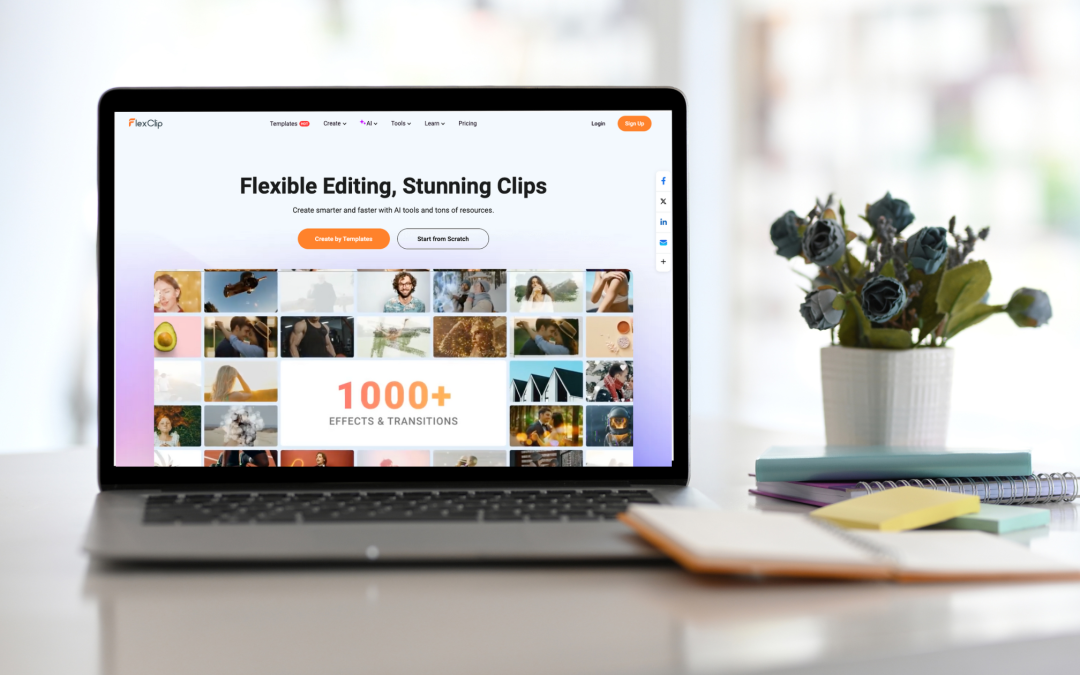
FlexClip is one such tool that empowers businesses to create professional-grade video content with ease, combining flexible editing features, AI-driven tools, and a wide range of resources designed to save time and elevate creativity.
Why FlexClip is Ideal for Business Use
Flexible Editing for Customised Content
FlexClip offers an intuitive and user-friendly interface, making it accessible to users of all skill levels. Whether you’re a novice or a seasoned video editor, FlexClip allows you to create tailored video content that aligns with your brand’s goals. With its drag-and-drop functionality, real-time preview, and wide selection of editing tools, you can effortlessly cut, trim, split, and rearrange video clips to create polished content. Flexibility is key, and FlexClip ensures that your videos can be edited quickly and precisely without the need for complex software.
AI Tools for Smarter, Faster Video Creation
Time is a valuable asset for any business, and FlexClip helps you save it with AI-powered tools designed to simplify the video creation process. Features like auto subtitle generation, background noise removal, and smart text-to-speech converters allow businesses to produce professional videos in a fraction of the time. By automating these tedious tasks, FlexClip frees up valuable time for more strategic and creative decision-making, ensuring faster turnaround times for your video projects.
Access to a Vast Library of Resources
FlexClip provides access to a huge library of stock footage, images, music, and customizable templates that are perfect for business use. Whether you’re producing a product demo, social media ad, corporate training, or internal communications video, FlexClip’s vast selection of resources ensures that you can create visually stunning and engaging content. From royalty-free music to video transitions and overlays, the platform is packed with everything you need to bring your creative vision to life.
Brand Consistency with Customisation
Maintaining brand consistency across all content is critical for businesses, and FlexClip excels at helping you stay on-brand. You can easily upload your own logos, fonts, and colour schemes to ensure every video reflects your business identity. With FlexClip, your videos are not only visually appealing but also aligned with your brand’s messaging and aesthetics.
Cross-Platform Integration for Maximum Reach
FlexClip allows for seamless cross-platform sharing, making it easy to export your videos in different formats suited for various platforms, including social media, websites, and email marketing campaigns. Whether you’re creating videos for Instagram, YouTube, LinkedIn, or your company’s internal portal, FlexClip’s export options ensure optimal quality and compatibility.
Cost-Effective Solution for Businesses
Investing in high-end video editing software can be costly, but FlexClip provides a cost-effective alternative without compromising quality. With scalable pricing options, FlexClip caters to businesses of all sizes, offering essential tools for small startups and expansive features for larger enterprises. By providing businesses with the resources they need at a fraction of the cost, FlexClip ensures a high return on investment for your video marketing efforts.
Key Benefits for Businesses Using FlexClip:
- Efficiency: AI-driven tools streamline the editing process, reducing time spent on manual tasks.
- Professional Quality: Access to a wide array of templates, stock footage, and high-quality effects for polished results.
- Scalability: Perfect for businesses of all sizes, from startups to established enterprises.
- Creativity: Customisable options allow you to create visually compelling and unique content.
- Cost-Effective: A budget-friendly alternative to high-end editing software.
FlexClip is more than just a video editor – it’s a comprehensive solution designed to help businesses create stunning, professional-quality video content quickly and efficiently. With its flexible editing features, AI tools, and vast library of resources, FlexClip empowers businesses to streamline their video production process and focus on delivering impactful content that resonates with their audience. Whether you’re looking to enhance your marketing efforts, improve internal communication, or elevate your social media presence, FlexClip provides the tools you need to succeed.
Embrace smarter, faster video creation with FlexClip and unlock the potential of your business content today!

by Anne Clark | Aug 28, 2024 | Business, Digital Marketing
Part 4: Converting Leads into Clients: Strategies and Best Practices
Converting leads into clients requires a strategic approach to move prospects through the final stages of the sales funnel. In this final part of my series, I’ll explore effective strategies to close deals and turn leads into loyal customers.
1. Develop a Follow-Up Strategy
- Structured Plan: Create a clear plan for following up with leads, including the timing and method of contact. For example, follow up with a phone call a week after sending an initial email.
- Multi-Channel Approach: Use a mix of communication channels such as email, phone, and social media to stay in touch with leads and keep your brand top-of-mind.
2. Address Common Objections
- Identify Objections: Anticipate common objections or concerns leads may have and prepare thoughtful responses. For instance, if price is a concern, be ready to discuss the value and ROI of your offering.
- Provide Solutions: Offer solutions or alternatives to address objections and reassure leads. For example, if a lead is hesitant about the cost, offer flexible payment options or a money-back guarantee.
3. Offer Free Consultations or Demos
- Consultations: Schedule free consultations to discuss the lead’s specific needs and demonstrate how your product or service can address them.
- Demos: Provide live or recorded demonstrations of your product to showcase its features and benefits in action.
4. Implement a Lead Scoring System
- Assign Scores: Create a system for scoring leads based on factors such as engagement level, demographic fit, and purchase intent. For example, assign higher scores to leads who have interacted with multiple pieces of content or attended a webinar.
- Prioritise Leads: Focus your efforts on high-scoring leads who are more likely to convert, and tailor your approach based on their score.
5. Create a Sense of Urgency
- Limited-Time Offers: Use time-sensitive promotions or discounts to encourage leads to act quickly. For example, offer a special discount for leads who sign up within the next 48 hours.
- Scarcity Tactics: Highlight limited availability or exclusive access to create a sense of urgency. For instance, “Only 10 spots left for our premium coaching programme!”
6. Analyse and Refine Your Approach
- Review Results: Regularly assess the effectiveness of your conversion strategies by reviewing conversion rates, feedback, and other relevant metrics.
- Continuous Improvement: Make data-driven adjustments to your approach based on insights and trends. For example, if a particular follow-up tactic is not yielding results, experiment with different methods or messaging.
By mastering these effective lead generation techniques, you can attract high-quality leads, nurture them through targeted strategies, and ultimately convert them into satisfied clients. Keep refining your approach and stay tuned for more insights to help your business succeed online.

by Anne Clark | Aug 21, 2024 | Business, Digital Marketing
Nurturing leads through email is crucial for building relationships and guiding potential clients toward making a purchase. In this third part of my series, I explore strategies for creating effective email campaigns that keep your leads engaged.
1. Segment Your Email List
- Define Segments: Categorise your leads based on criteria such as their interests, behaviour, or stage in the sales funnel. For example, segment leads who downloaded a specific lead magnet versus those who attended a webinar.
- Personalised Content: Tailor your email content to each segment’s needs and preferences. Use dynamic content to show different information based on the recipient’s segment.
2. Create a Welcome Series
- Initial Email: Send a warm welcome email that thanks the subscriber for joining and sets expectations for what’s to come.
- Follow-Up Emails: Include a series of emails that provide valuable content, introduce your brand, and offer additional resources or offers.
- Engagement Triggers: Encourage interaction with CTAs such as surveys, feedback requests, or special offers.
3. Provide Value with Regular Content
- Educational Content: Share useful tips, insights, or resources that address your leads’ pain points. For instance, if you offer consulting services, send emails with actionable business strategies.
- Exclusive Offers: Provide special promotions or discounts to keep your audience engaged and incentivise them to take action.
- Updates and News: Keep leads informed about your latest products, services, or industry news that may interest them.
4. Use Personalisation Techniques
- Personalised Greetings: Address recipients by their first name and refer to their specific interests or interactions.
- Tailored Recommendations: Suggest products or services based on their previous actions or preferences.
5. Implement Behavioural Triggers
- Automated Emails: Set up triggers based on user actions, such as visiting a specific page or downloading a resource. For example, send a follow-up email with related content if a lead downloads a free guide.
- Abandoned Cart Emails: For e-commerce businesses, send reminders to leads who have added items to their cart but haven’t completed the purchase.
6. Monitor and Optimise Performance
- Track Metrics: Analyse open rates, click-through rates, conversion rates, and other key metrics to assess the effectiveness of your email campaigns.
- A/B Testing: Test different email subject lines, content formats, or CTAs to determine what works best for your audience.
- Feedback and Adjustments: Gather feedback from subscribers and adjust your strategy based on their responses and engagement patterns.

by Anne Clark | Aug 14, 2024 | Business
Following up on my last post, Part 1: Effective Lead Generation Techniques, I am exploring landing pages where your leads land after clicking on your CTA. Its design and content play a crucial role in converting visitors into leads. In this second part of our series, I’ll explore how to create landing pages that captivate and convert.
1. Craft a Compelling Headline
- Clarity: Ensure your headline is clear and directly related to your offer. For instance, “Get Your Free Guide to Mastering Social Media Marketing” clearly states what’s being offered.
- Action-Oriented Language: Use action verbs to encourage immediate action. For example, “Discover the Secrets to Skyrocketing Your Sales” is more engaging than “Learn About Sales Techniques.”
- Benefit-Focused: Highlight the main benefit of your offer. For instance, “Unlock Strategies to Double Your Revenue” focuses on the outcome your audience desires.
2. Write Persuasive Copy
- Benefit-Driven Content: Focus on how your offer solves the visitor’s problem or adds value. Use bullet points to list key benefits or features.
- Emotional Appeal: Connect with your audience on an emotional level by addressing their pain points or aspirations.
- Social Proof: Include testimonials, reviews, or case studies to build trust. For example, “See how Jane Doe increased her leads by 50% using our strategies.”
3. Design for Clarity and Simplicity
- Minimalist Layout: Use a clean, uncluttered design to keep the focus on your offer and CTA. Avoid distractions like excessive links or unrelated content.
- Easy Navigation: Ensure users can easily understand how to proceed. Use simple and intuitive navigation if your landing page includes multiple sections.
4. Incorporate High-Quality Visuals
- Relevant Images: Use images or videos that enhance your message. For example, if you’re offering a guide on website optimisation, include screenshots or graphics related to web design.
- Professional Quality: Ensure all visuals are high-resolution and professionally designed to reflect the quality of your brand.
5. Optimise for Mobile Devices
- Responsive Design: Ensure your landing page adjusts seamlessly to different screen sizes. Test on various devices to confirm a smooth user experience.
- Mobile-Friendly Features: Use large, easily clickable buttons and avoid long forms that are cumbersome to complete on mobile devices.
6. Implement Tracking and Analytics
- Set Up Tracking: Use tools like Google Analytics or Facebook Pixel to track user interactions and conversions on your landing page.
- Analyse Data: Regularly review performance metrics to understand how well your landing page is converting and identify areas for improvement.

by Anne Clark | Jun 2, 2024 | Business, Canva, Creative
Canva is a powerful, user-friendly design tool that has revolutionised how people create visual content. Whether you’re a small business owner, a social media manager, or just someone who loves designing, Canva can help you produce professional-looking graphics without needing advanced design skills. If you’re new to Canva, here are some of the best tips and tricks to get you started on your design journey.
1. Get Familiar with Canva’s Interface
Before diving into design, take a few minutes to explore Canva’s interface. Familiarise yourself with the toolbar on the left, where you can access templates, elements, text, and uploads. The top bar provides options for undoing actions, resizing designs, and accessing additional settings. Understanding the layout will help you navigate the platform more efficiently.
2. Start with Templates
One of Canva’s greatest strengths is its vast library of templates. For beginners, starting with a template can save time and provide inspiration. Whether you need a social media post, a presentation, or a flyer, there’s a template for almost everything. Choose a template that matches your needs and customize it to fit your brand.
3. Use the Search Function
Canva’s search function is a powerful tool for finding specific elements, photos, and templates. If you have a particular theme or style in mind, use keywords to search for relevant assets. This can save you time and help you find exactly what you need.
4. Learn to Use Layers
Understanding layers is crucial for effective design. In Canva, elements are stacked in layers, which you can rearrange to bring items forward or send them backward. Right-click on an element to adjust its layering. This feature is particularly useful when working with multiple design elements.
5. Utilise Grids and Frames
Grids and frames are excellent tools for organizing your design. Grids help you align elements neatly, ensuring your design is balanced. Frames allow you to insert images that fit perfectly within shapes. Drag and drop your photos into frames to create clean, professional-looking compositions.
6. Customise Colours and Fonts
Brand consistency is key, even for beginners. Customize your designs by using your brand’s colours and fonts. Canva allows you to save brand colours and upload custom fonts if you have a Canva Pro account. Consistent use of colours and fonts helps in creating a cohesive brand identity.
7. Experiment with Transparency
Adding transparency to elements can create a stylish, layered look. Select the element you want to adjust and use the transparency slider in the top-right corner to make it more see-through. This is especially useful for backgrounds or overlays.
8. Group Elements for Easier Editing
When working with multiple elements, grouping them can simplify the editing process. Select the elements you want to group, right-click, and choose “Group.” This way, you can move and resize them together without disrupting the layout.
9. Take Advantage of Canva’s Design School
Canva offers a wealth of educational resources through its Design School. From beginner tutorials to advanced design tips, you can find video lessons and articles to enhance your design skills. Spending some time in Design School can pay off significantly in improving your designs.
10. Save Your Work in Folders
As you create more designs, keeping them organized becomes important. Canva allows you to save your designs in folders. Use folders to categorise your work, making it easier to find and manage your projects later.
11. Use Keyboard Shortcuts
Keyboard shortcuts can speed up your design process. Here are a few useful ones:
- Ctrl/Cmd + D: Duplicate an element
- Ctrl/Cmd + Z: Undo
- Ctrl/Cmd + Shift + Z: Redo
- Ctrl/Cmd + A: Select all elements
- Ctrl/Cmd + G: Group selected elements
- Ctrl/Cmd + Shift + G: Ungroup selected elements
12. Export in the Right Format
When your design is ready, export it in the appropriate format. Canva offers various export options, including PNG, JPG, PDF, and more. For web use, PNG is often the best choice for its quality. For print, use PDF to maintain resolution and clarity.
With these tips and tricks, you’re well on your way to becoming a Canva pro. Remember, practice makes perfect, so keep experimenting with different features and styles. Canva’s intuitive interface and vast resources make it an excellent tool for beginners looking to create stunning designs. Happy designing!