
by Anne Clark | Dec 19, 2024 | Email Marketing, Mailchimp
Mailchimp is a powerful email marketing platform packed with features designed to help you connect with your audience, drive engagement, and grow your business. While you may already be familiar with its basic tools, there are advanced features that often go unnoticed but can significantly enhance your campaigns. Here are five Mailchimp features you’re probably not using—but absolutely should!
1. Predictive Insights
Did you know Mailchimp uses artificial intelligence to predict customer behaviour? Predictive Insights provide data-driven forecasts on the likelihood of customer purchase or engagement. These insights can help you:
- Identify your most promising leads.
- Target high-value customers with exclusive offers.
- Optimise your campaigns by focusing on audience segments with the highest conversion potential.
Why You Should Use It: This feature takes the guesswork out of marketing and allows you to allocate your resources more effectively.
2. Send Time Optimisation
When you send your emails can have a huge impact on open rates. Mailchimp’s Send Time Optimisation uses historical data to determine the best time to send your campaigns based on your audience’s engagement patterns. You can schedule emails when they’re most likely to be opened and read.
Why You Should Use It: With this feature, you’ll no longer need to guess the best time to reach your audience. Instead, you can maximise your visibility and engagement effortlessly.
3. Dynamic Content
Mailchimp’s Dynamic Content feature allows you to personalise your email campaigns for different audience segments—all within the same email. You can display different text, images, or offers based on subscriber preferences, purchase history, or demographics.
Example: A clothing retailer can show winter coats to subscribers in colder regions and swimsuits to those in warmer areas, all in one email.
Why You Should Use It: Personalisation is key to boosting engagement. Dynamic Content helps you tailor your emails without the need to create multiple campaigns.
4. Automations for E-commerce
Mailchimp’s automation tools for e-commerce go beyond simple welcome emails. You can create sophisticated workflows such as:
- Abandoned Cart Emails: Automatically remind customers about products they left in their cart.
- Post-Purchase Follow-ups: Send thank-you emails or suggest complementary products.
- Win-Back Campaigns: Re-engage customers who haven’t made a purchase in a while.
Why You Should Use It: These automations help you recover lost sales, encourage repeat purchases, and maintain a strong connection with your customers.
5. Surveys and Feedback Forms
Engagement doesn’t stop at sending emails. With Mailchimp’s Survey and Feedback Form tools, you can easily collect valuable input from your subscribers. Use these forms to:
- Gather insights about your products or services.
- Identify topics your audience wants to hear about.
- Measure customer satisfaction.
Mailchimp integrates survey results directly into your audience data, making it easy to refine your marketing strategies.
Why You Should Use It: Understanding your audience is critical for growth. Surveys and feedback forms give you actionable insights to improve your offerings.
Bonus Tip: Use Mailchimp Analytics to Monitor Success
Once you’ve started using these features, track their performance using Mailchimp’s analytics dashboard. Monitor open rates, click-through rates, and conversion metrics to see how these features are improving your campaigns.
Mailchimp is more than just a platform for sending emails; it’s a comprehensive marketing solution. By tapping into features like Predictive Insights, Send Time Optimisation, Dynamic Content, E-commerce Automations, and Surveys, you can unlock its full potential and take your marketing strategy to the next level.
Ready to master Mailchimp? Contact me for personalised training and services to help you make the most of these powerful tools. Together, we’ll transform your email marketing strategy into a results-driven powerhouse!
by Anne Clark | Sep 20, 2024 | Business, Digital Marketing
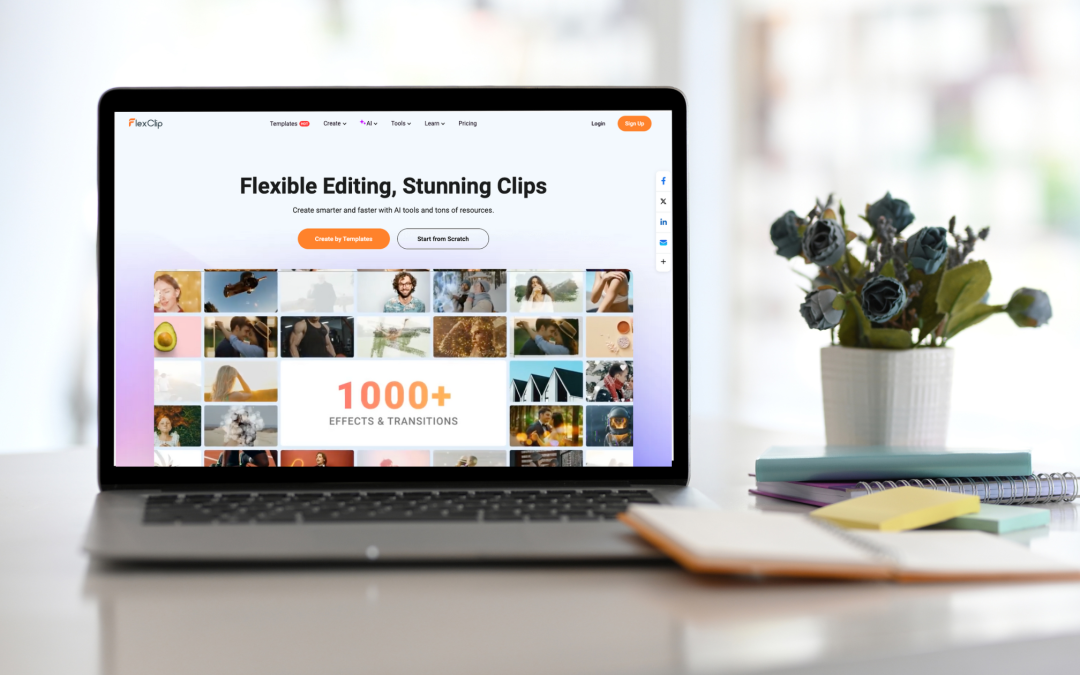
FlexClip for Business: The Ultimate Tool for Flexible Editing and Stunning Clips
 When you are a small business and need to create videos, but can’t afford the cost of a videographer at this stage, then I have a great tool for you to check out. FlexClip is your video editing one-stop shop. Allow me to explain.
FlexClip is one such tool that empowers businesses to create professional-grade video content with ease, combining flexible editing features, AI-driven tools, and a wide range of resources designed to save time and elevate creativity.
Why FlexClip is Ideal for Business Use
Flexible Editing for Customised Content
FlexClip offers an intuitive and user-friendly interface, making it accessible to users of all skill levels. Whether you’re a novice or a seasoned video editor, FlexClip allows you to create tailored video content that aligns with your brand’s goals. With its drag-and-drop functionality, real-time preview, and wide selection of editing tools, you can effortlessly cut, trim, split, and rearrange video clips to create polished content. Flexibility is key, and FlexClip ensures that your videos can be edited quickly and precisely without the need for complex software.
AI Tools for Smarter, Faster Video Creation
Time is a valuable asset for any business, and FlexClip helps you save it with AI-powered tools designed to simplify the video creation process. Features like auto subtitle generation, background noise removal, and smart text-to-speech converters allow businesses to produce professional videos in a fraction of the time. By automating these tedious tasks, FlexClip frees up valuable time for more strategic and creative decision-making, ensuring faster turnaround times for your video projects.
Access to a Vast Library of Resources
FlexClip provides access to a huge library of stock footage, images, music, and customizable templates that are perfect for business use. Whether you’re producing a product demo, social media ad, corporate training, or internal communications video, FlexClip’s vast selection of resources ensures that you can create visually stunning and engaging content. From royalty-free music to video transitions and overlays, the platform is packed with everything you need to bring your creative vision to life.
Brand Consistency with Customisation
Maintaining brand consistency across all content is critical for businesses, and FlexClip excels at helping you stay on-brand. You can easily upload your own logos, fonts, and colour schemes to ensure every video reflects your business identity. With FlexClip, your videos are not only visually appealing but also aligned with your brand’s messaging and aesthetics.
Cross-Platform Integration for Maximum Reach
FlexClip allows for seamless cross-platform sharing, making it easy to export your videos in different formats suited for various platforms, including social media, websites, and email marketing campaigns. Whether you’re creating videos for Instagram, YouTube, LinkedIn, or your company’s internal portal, FlexClip’s export options ensure optimal quality and compatibility.
Cost-Effective Solution for Businesses
Investing in high-end video editing software can be costly, but FlexClip provides a cost-effective alternative without compromising quality. With scalable pricing options, FlexClip caters to businesses of all sizes, offering essential tools for small startups and expansive features for larger enterprises. By providing businesses with the resources they need at a fraction of the cost, FlexClip ensures a high return on investment for your video marketing efforts.
Key Benefits for Businesses Using FlexClip:
- Efficiency: AI-driven tools streamline the editing process, reducing time spent on manual tasks.
- Professional Quality: Access to a wide array of templates, stock footage, and high-quality effects for polished results.
- Scalability: Perfect for businesses of all sizes, from startups to established enterprises.
- Creativity: Customisable options allow you to create visually compelling and unique content.
- Cost-Effective: A budget-friendly alternative to high-end editing software.
FlexClip is more than just a video editor – it’s a comprehensive solution designed to help businesses create stunning, professional-quality video content quickly and efficiently. With its flexible editing features, AI tools, and vast library of resources, FlexClip empowers businesses to streamline their video production process and focus on delivering impactful content that resonates with their audience. Whether you’re looking to enhance your marketing efforts, improve internal communication, or elevate your social media presence, FlexClip provides the tools you need to succeed.
Embrace smarter, faster video creation with FlexClip and unlock the potential of your business content today!

by Anne Clark | Jul 6, 2024 | Mailchimp
Effective audience management is crucial for the success of your email marketing campaigns. With Mailchimp, you have robust tools at your disposal to import and manage contacts, segment audiences for targeted campaigns, and create and manage groups and tags. This blog will guide you through these essential aspects of Mailchimp’s audience management capabilities, helping you optimise your email marketing efforts.
Importing and Managing Contacts
The first step in audience management is importing your contacts into Mailchimp. Here’s how to do it:
- Importing Contacts:
- From a File: Mailchimp supports CSV, TXT, and Excel files. Ensure your file is formatted correctly with columns for email addresses and any other relevant information (e.g., first name, last name).
- From Other Services: Mailchimp integrates with numerous platforms, such as Shopify, WooCommerce, and Salesforce. Use these integrations to import contacts directly from your e-commerce or CRM platforms.
- Adding Contacts Manually:
- Navigate to the Audience tab and click on “Add a Subscriber.” Fill in the required fields, such as email address, name, and any other custom fields you’ve set up.
- Managing Contacts:
- Edit Contact Information: Update contact details as needed by clicking on the contact’s name in your audience list.
- Remove Contacts: Clean your list by removing inactive or unengaged contacts. This helps maintain a healthy email list and improves deliverability rates.
Segmenting Audiences for Targeted Campaigns
Segmenting your audience allows you to create more personalised and relevant email campaigns. Mailchimp’s segmentation tools enable you to divide your audience based on various criteria:
- Basic Segmentation:
- Demographics: Segment contacts by age, gender, or location.
- Engagement: Target contacts based on their interaction with your previous emails, such as opens and clicks.
- Advanced Segmentation:
- Purchase Behaviour: Segment contacts based on their purchasing history, such as frequent buyers or customers who haven’t purchased in a while.
- Custom Fields: Use custom fields (e.g., interests, preferences) to create highly specific segments.
- Creating Segments:
- Navigate to the Audience tab and select “Segments.” Click on “Create Segment” and choose the criteria for your segment. Mailchimp allows you to combine multiple conditions using “and/or” logic to refine your segments further.
Creating and Managing Groups and Tags
Groups and tags are powerful tools in Mailchimp for organising your contacts and creating more targeted campaigns.
- Groups:
- Purpose: Groups are useful for organising contacts based on their preferences or behaviours. For example, you might create groups for different product categories, subscription levels, or event attendees.
- Creating Groups: In the Audience tab, click on “Manage Audience” and select “Groups.” Click “Create Groups,” name your group, and add the relevant options.
- Managing Groups: Assign contacts to groups manually or through import. You can also allow subscribers to choose their own groups via sign-up forms.
- Tags:
- Purpose: Tags are labels you assign to contacts to help identify and categorise them. Tags are more flexible than groups and can be used for more granular organisation.
- Creating Tags: Click on a contact’s name in your audience list and use the “Add Tag” option to create a new tag or assign an existing one.
- Managing Tags: Use tags to filter contacts and create targeted campaigns. You can also apply tags during the import process by including a column for tags in your file.
Best Practices for Audience Management
- Regularly Clean Your List:
- Remove inactive contacts to improve your open and click rates. This also helps avoid spam complaints and maintains a healthy sender reputation.
- Use Double Opt-In:
- Implement double opt-in for new subscribers to ensure they genuinely want to receive your emails. This reduces the risk of spam complaints and improves engagement rates.
- Personalise Your Campaigns:
- Use merge tags to personalise emails with the recipient’s name, purchase history, or other relevant information. Personalised emails often see higher engagement rates.
- Monitor Engagement:
- Regularly review your email campaign reports to understand how your audience interacts with your emails. Use this data to refine your segmentation and targeting strategies.
Effective audience management in Mailchimp is the cornerstone of successful email marketing. By importing and managing your contacts efficiently, segmenting your audience for targeted campaigns, and creating and managing groups and tags, you can ensure your emails reach the right people with the right message at the right time. Implement these strategies to optimise your email marketing efforts and drive better results for your business. Happy emailing!
If you need help or would prefer someone did this for you, then please reach out to me here.

by Anne Clark | Apr 30, 2024 | Business, Customer Journey
The smallest details can make the biggest difference in crafting a memorable customer journey. Here are ten simple yet effective ways to elevate the experience and turn casual browsers into loyal customers.
1. Personalised Greetings
Imagine logging onto a website and being greeted by name! Simple personalised touches, such as addressing customers by name in emails or when they log into your site, can make them feel valued and enhance their connection to your brand.
2. Responsive Customer Service
Quick and empathetic responses to customer enquiries or complaints can transform a potentially negative experience into a positive one. Leveraging AI chatbots for immediate replies and routing complex queries to human agents can ensure customers feel heard and supported.
3. User-Friendly Website Design
A clean, intuitive website design is crucial. Ensure that your navigation is straightforward and that key information is easy to find. Optimise for mobile use, as a significant portion of users access the internet via their smartphones.
4. Reward Loyalty
Introduce a loyalty programme that rewards repeat customers with discounts, special offers, or early access to new products. This not only encourages repeat business but also fosters a deeper brand connection.
5. Surprise and Delight
Occasionally, surprising customers with a small freebie or an unexpected upgrade can leave a lasting impression. This could be as simple as a complimentary product sample with their order or a random upgrade to expedited shipping.
6. Consistent Communication
Keep your customers in the loop with regular updates about their orders, changes to services, or upcoming promotions. Transparency builds trust, and keeping customers informed shows that you value their business.
7. Simplify the Checkout Process
A complicated checkout process can deter potential sales. Streamline the process to minimise the number of steps and reduce cart abandonment. Offer multiple payment options to cater to different preferences.
8. Solicit Feedback
Regularly ask for feedback through surveys or follow-up emails after a purchase. This not only provides you with valuable insights into how to improve but also shows customers that you are committed to meeting their needs.
9. Educational Content
Provide value beyond the sale with educational content related to your products or industry. This could be in the form of blogs, tutorials, or user guides. Educated customers are more likely to appreciate the value of your offerings.
10. Community Engagement
Create a community around your brand by encouraging customers to interact with you and each other on social media or forums. Host live events or webinars where customers can learn and share experiences.
By focusing on these small yet impactful details, businesses can significantly enhance the customer journey, turning casual interactions into lasting relationships. Remember, in the realm of customer experience, it’s often the little things that count the most!

by Anne Clark | Apr 27, 2024 | Business, Business Services, Kajabi
Getting Started with Kajabi: A Step-by-Step Guide for Beginners
Kajabi is a comprehensive platform that enables entrepreneurs, educators, and creatives to build and manage their online businesses. Whether you’re planning to launch an online course, a membership site, or to market digital products, Kajabi provides all the tools you need in one place. Allow me to walk you through the basics of setting up your Kajabi account and getting your first product or course live!
Step 1: Sign Up and Set Up Your Account
Create an Account
Start by visiting the Kajabi website and signing up for an account. Kajabi offers a free trial, allowing you to explore its features before making any financial commitment. Fill in your details and select the plan that best fits your needs.
Navigate the Dashboard
Once your account is active, take some time to familiarise yourself with the dashboard. This is your control centre where you can access all of Kajabi’s features, such as creating products, setting up marketing campaigns, and analysing performance metrics.
Step 2: Define Your Product
Select a Product Type
Kajabi allows you to create various types of digital products including online courses, coaching programmes, and membership sites. Decide what you want to offer based on your expertise and market demand.
Create Your Product
– Go to the “Products” tab on the dashboard.
– Click on “New Product” and choose the product type.
– Follow the on-screen instructions to name your product and fill in the necessary details.
Step 3: Upload Content
Organise Your Modules and Lessons
Structure your product by creating modules and lessons. This helps in organising the content logically and enhances the learning experience.
Upload Content
– For each lesson, you can upload videos, text, images, and files.
– Use the built-in WYSIWYG editor to format text and embed media.
Set Learning Paths
Decide if learners must complete lessons in sequence or can skip around. This is crucial for structuring courses and ensuring a comprehensive learning journey.
Step 4: Customise Your Site
Design Your Site
Use Kajabi’s website builder to create your home page, landing pages, and blog. Customise the design to match your brand’s aesthetics by choosing themes and editing layouts.
Add Pages and Navigation
Ensure that your site is easy to navigate by setting up a clear menu. Include essential pages such as “About,” “Contact,” and “FAQ.”
Step 5: Set Up Payments and Pricing
Integrate Payment Gateways
Kajabi supports integrations with major payment gateways like Stripe and PayPal. Connect your account to start accepting payments securely.
Define Pricing Models
Decide on your pricing strategy. Kajabi allows you to set up one-time payments, subscriptions, and payment plans. Choose what best suits your product and target audience.
Step 6: Launch Marketing Campaigns
Email Marketing
Utilise Kajabi’s email marketing tools to build your mailing list and engage with your audience. Create automated email sequences that nurture leads and convert them into customers.
Utilise Pipelines
Pipelines are Kajabi’s automated marketing funnels. Set up pipelines to guide potential customers through different stages, from awareness to purchase.
Step 7: Analyse and Optimise
Track Performance
Monitor how your products are performing using Kajabi’s analytics tools. Track sales, user engagement, and other key metrics.
Optimise Based on Insights
Use the insights gained from analytics to optimise your content, marketing strategies, and overall business approach.
Kajabi offers a powerful suite of tools designed to help you launch and grow your online business. By following these steps, you’ll be well on your way to creating a successful digital platform that empowers both you and your audience. Don’t forget that the key to success in Kajabi is continuous learning and adapting. If you need help setting up and launching your Kajabi, then please reach out to me to learn how I can support you.