How to Set Up Your Mailchimp Account: A Step-by-Step Guide
Setting up a Mailchimp account can open up new avenues for email marketing, allowing you to engage with your audience more effectively. Here’s a detailed, step-by-step guide to help you get started with Mailchimp, from creating an account to sending your first email campaign.
Click on 'Sign Up Free': You'll find this button on the top right corner of the homepage.
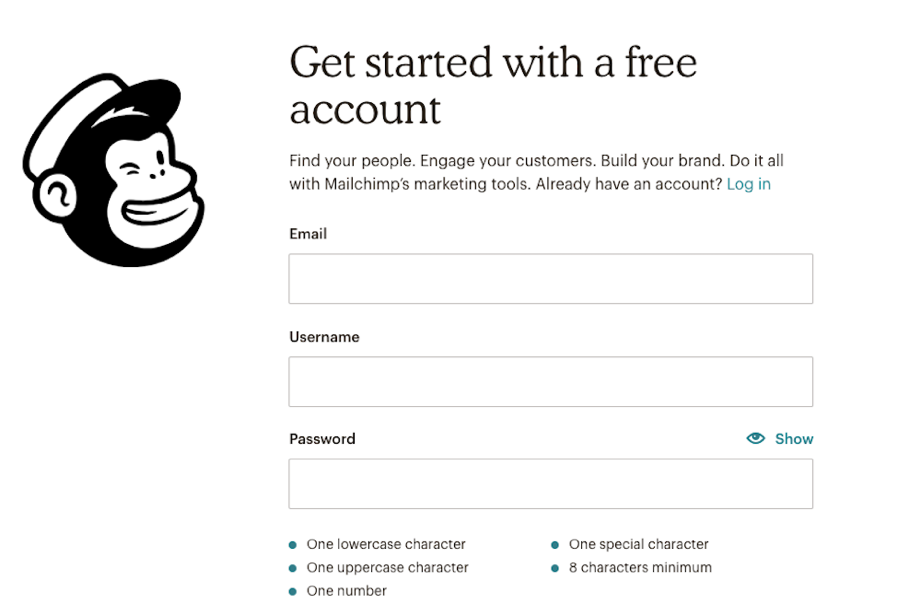
Enter your email, username, and password: Follow the prompts to enter your details. Mailchimp requires a strong password, so be sure to mix upper and lower case letters, numbers, and symbols.
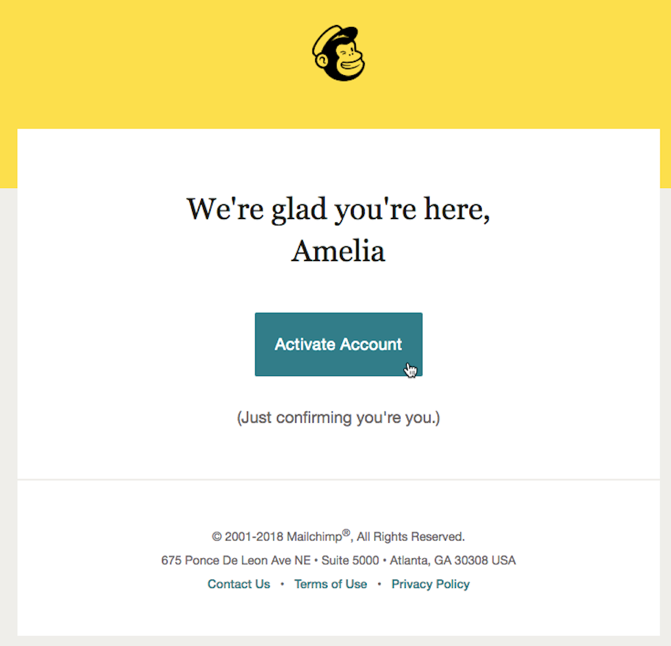
Activate your account: Check your email for a confirmation message from Mailchimp and click the activation link provided.
Step 2: Set Up Your Profile
Fill in your personal information: After activation, complete your profile by providing details like your name and contact information.
Set your time zone: This ensures that your email campaigns are sent according to your local time.
Add your address: Legal requirements necessitate that your physical business address is included in every email footer to comply with anti-spam laws.
Step 3: Create Your Audience
Navigate to the Audience section: This can usually be found in the sidebar menu under ‘Audience’.
Create an audience: If you're new to Mailchimp, you’ll need to set up your first audience. Enter details such as the audience name and default email address.
Import your contacts: If you already have an email list, you can import it via CSV file, or manually enter subscriber details.
Step 4: Customise Your Email Preferences
Set up your email templates: Go to the ‘Templates’ section and choose from pre-designed templates or create your own.
Personalise your template: Customise your chosen template with your brand’s logo, colours, and fonts to make your emails recognisable to your subscribers.
Step 5: Design Your First Campaign
Go to the Campaigns section: Click ‘Create Campaign’.
Choose your campaign type: Select ‘Email’ and then choose between a regular campaign and an automated one.
Customise your campaign: Add content and design your email. You can use drag-and-drop builders, which are user-friendly even for beginners.
Step 6: Test and Send Your Campaign
Preview and test: Always send a test email to yourself to check the design and content before sending it to your audience.
Schedule or send your campaign: Choose ‘Send Now’ to send your email immediately or ‘Schedule’ to send it at a later time.
Step 7: Analyse the Results
Check your reports: After sending your emails, monitor how they perform. Mailchimp provides detailed reports that include open rates, click rates, and subscriber activity.
Adjust based on feedback: Use the insights from your reports to improve your future email campaigns.
Setting up your Mailchimp account is just the beginning of your email marketing journey. With its comprehensive set of tools and features, Mailchimp not only helps you manage your email lists and campaigns but also provides analytics that can guide your marketing strategies. Remember, the key to successful email marketing is consistency and adaptation based on recipient feedback and engagement metrics.
Do you find yourself struggling to think of content for your regular newsletter to your mailing list? Do you feel like you have writers block? Do you feel like you have nothing to say?
Let me make it easier for you.
Have you considered having a pre-set template? This is a great way to help you pre-plan your content and create your newsletter in a more timely manner. But what do incorporate?
Here are 5 items to include in your newsletters as regular content;
#1 Introduction
Always open with a brief hello and what you’re up to. Connecting with your audience is vital and sharing a little about you, makes them know you’re real and that you care about them as your audience.
Connection is the key.
TIP: Make sure you personalise the email to include their name. Small personal touches go a long way.
#2 Valuable information
Imagine getting an email that is giving you some awesome information relevant to you. Now imagine getting an email that’s all about them and salesy. That’s right ... a real turn off. Give a little to gain a little, or hopefully more.
#3 Your latest projects or blogs
Don’t always assume your audience is reading your blogs or social media post. Remember, they’ve invited you into their personal space by allow YOU to have their email address because they may not have time for social media or may not be online as often as assumed.
Depending on the length of your blog, you may want to put the whole things in your newsletter, or insert a portion of it and link the rest back to your website.
#4 Links to other services
We often assume that everyone remembers what we do. But be honest, do you remember what everyone does? Don't be afraid to have dedicate a section to your other services, this can be done in the form of images with the service title and of course ensure its linkable to your website where further details are.
If you have a special running, then you can dedicate this area to that. Just don’t make the whole newsletter about you, remember it’s a relationship with your target audience so a bit of give and take goes a long way.
#5 Bio
In the footer of your newsletter you can have your social media platform linked and why not add a photo of you and a short paragraph blurb about who and what you do (another refresher for your audience).
TIP: Use a professional headshot, it’s the best investment you’ll make.
#6 But I sell products not services
If you’re a retail product selling business, then you may have heard the term ‘picture tells a thousand words’. Use images of your products in your newsletter. You may have a product you’re wanting to move the last stock items off, so promote it in your newsletter, say something like ‘whilst stock lasts’ or ‘limited stock left, don't miss out’. Putting an ‘urgency’ with it, makes people take action faster.
Launching a new product, then share it. Maybe even offer an upsell product that would go well with the product.
TIP: Do not flood your newsletter with millions of images, it gets to overwhelming for your audience.
Feel like it’s all a bit hard and just want someone to create your branded newsletter for you. Guess what? I can, I am a Mailchimp expert and can create your branded newsletter templates, or automation series. Contact me today if you would like to know more.
Mailchimp is the All-In-One integrated marketing platform for small businesses, to grow your business on your terms. It’s free for your first 2000 subscribers, it enables you to use it’s automation functions for signs and sending welcome emails. It integrates with your website.
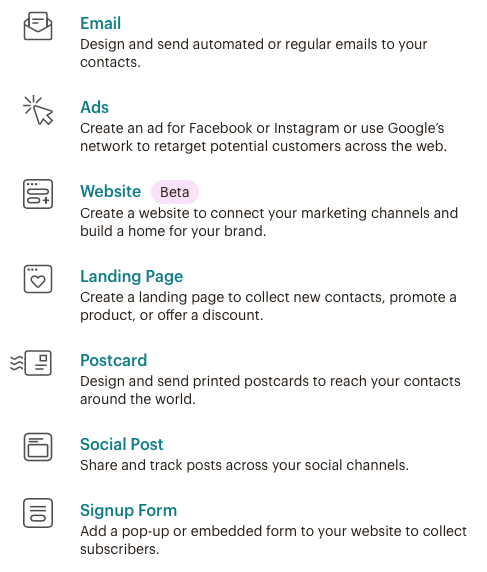
Some of the functions Mailchimp offers are:
• Sending Newsletter Campaigns • Creating Automation Workflows • Creating Landing Pages • Creating Websites • Posting to Social Media
It integrates with wordpress, zapier, slack and canva. And 300+ others.
It provides reporting analytics to enable you to enhance your campaigns.
As Mailchimp is a web-based application. You will need to have an internet browser.
You'll need to provide an email address that will be associated with the account you’re setting up. As you’ll need to verify and confirm your account and URL.
Your Mailchimp username must be unique, and cannot be reused.
You will need to provide a mailing address, I would recommend using a PO Box for security purposes especially if you do not operate your business from a physical premises.
All accounts start on our Free plan, so you don't need a credit card to sign up.
If you choose to purchase add-ons or upgrade to a paid plan, you will be able to pay these via credit card or paypal.
Sign up for an account
Click here to sign up. It’s important to note that when you sign up you are agreeing to terms of use and anti-spam regulations.
Type in your Email, Username, and Password, and click Get Started!
A confirmation message will appear advising you to check your inbox to activate your account set up .
Activate your account
When you receive your account activation email from Mailchimp Client Services, you can complete the account setup.
Click the account activation link in the email.
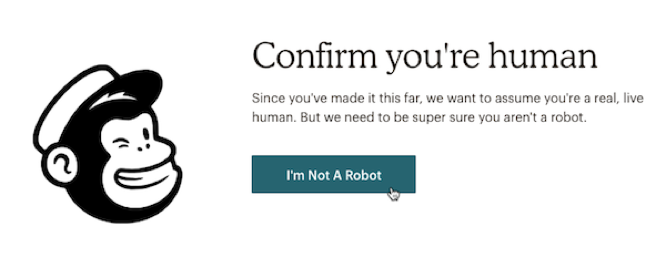
You will need to confirm Humanity screen, check the I'm not a robot box, and click Confirm Signup.
Sign up for an account
Click here to sign up. It’s important to note that when you sign up you are agreeing to terms of use and anti-spam regulations.
Type in your Email, Username, and Password, and click Get Started!
A confirmation message will appear advising you to check your inbox to activate your account set up .
Activate your account
When you receive your account activation email from Mailchimp Client Services, you can complete the account setup.
Click the account activation link in the email.
You will need to confirm Humanity screen, check the I'm not a robot box, and click Confirm Signup.
The signup process
In setting up, Mailchimp will ask for required information. This information enables them to provide content that is relevant to you and your company's needs, as well as to help make sure your account is compliant with our Terms of Use. In this section, you'll learn how we use this information.
Name
Email Address
Organisation Questions
Organisation Name
Website URL
Physical Address
After you type in the information, follow the prompts to finish the process and log into your new Mailchimp account.
To busy to be doing all this yourself, then why not have your Mailchimp Partner assist you. Simply click here.
Here are your step by step instructions on creating an email campaign/newsletter in Mailchimp.
Firstly, log into your account.
Click on CREATE on the top menu
Click on EMAIL in the dropdown menu
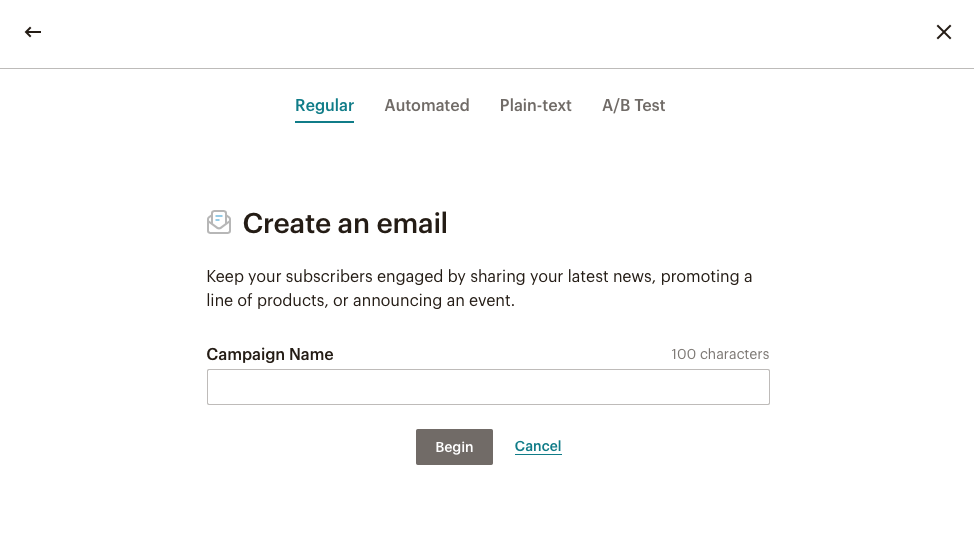
If you are sending a one off email to your mailing list, you want to select REGULAR.
NAME your campaign, and click BEGIN
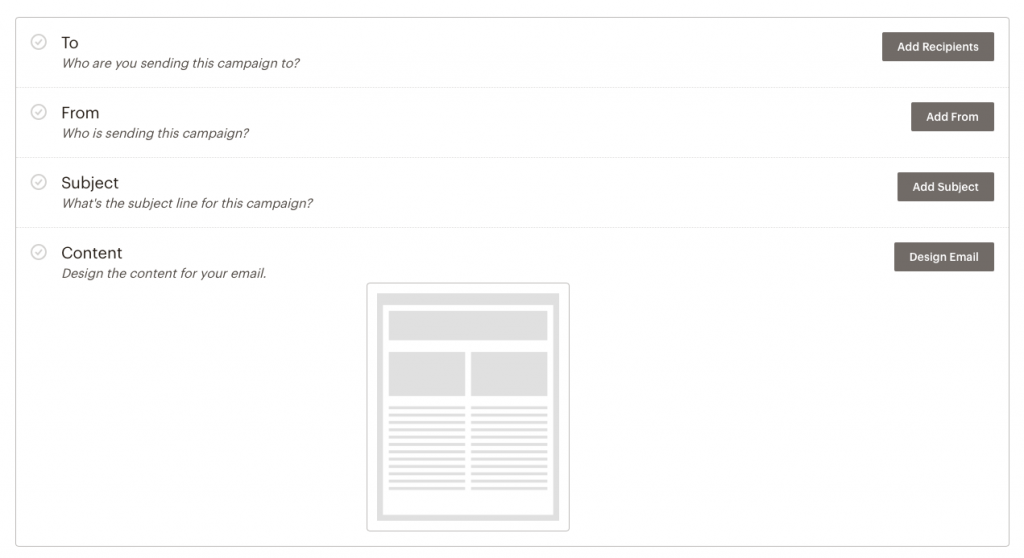
Click on TO, and select your list you’re emailing.
Click on FROM, and enter your details (email and name)
Click on SUBJECT, and enter your email subject.
Click on CONTENT and design your newsletter.
To design your newsletter
Select a template
Choose a template in the Content section of the Campaign Builder. The template you select will be the foundation of your design.
To select a template, follow these steps.
In the Content section of the Campaign Builder, click Design Email.
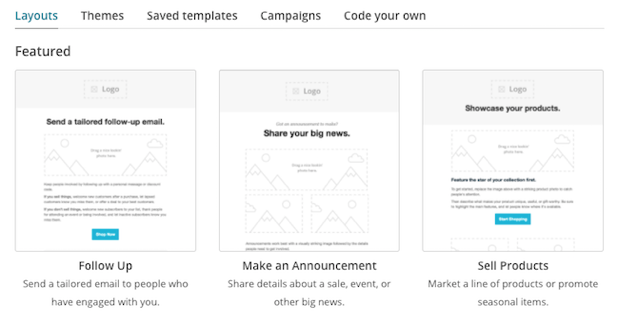
On the Template step, click the template you want to use. You can always go back later to switch templates.
Choose from Layouts (Featured and Basic), Themes, Saved templates, Campaigns, or Code your own to begin to design your campaign.
Add your content
After you choose a template, you'll move on to the Design step of the Content section. Use content blocks to add and format text, upload images, link to files, and more. All templates show placeholder text and images to help you begin to design your campaign. Depending on the template you choose, you can add, delete, move, and replicate content blocks to create the look and feel you want.
Drag and drop content blocks
Our drag-and-drop editor allows you to duplicate, delete, and rearrange content blocks. Drag and drop a variety of content blocks into your layout and rearrange them to customize the look and feel of your campaign.
Add text
The best way to add text to your campaign is to type it directly into the content block editing pane. If you prefer to work outside of the campaign builder, copy and paste your content from a simple text editor, like Notepad or TextWrangler.
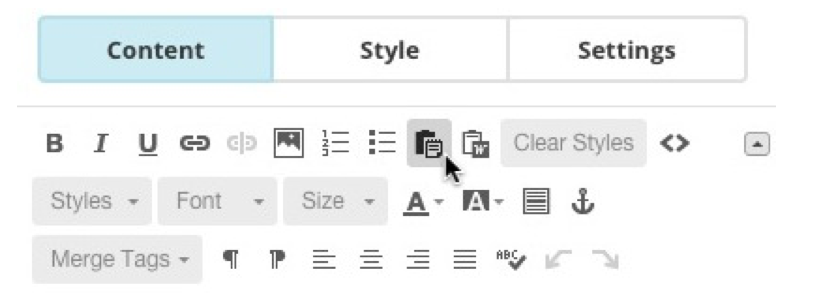
Avoid rich-text word-processing programs, like Word or Publisher. They add styling code to the text that can prevent your ability to style content in the campaign builder.If you want to copy content from a rich-text editor, website, or email program, click the Paste as plain text icon on the editor toolbar to add your text.
If content has already been added to your campaign and you didn't use the Paste as plain text option, or if content doesn't update when you apply styling to your text, click Clear Styles and try again.
For those who are setting up websites using Squarespace but struggling on how to link it to the Mailchimp account. Here are some instruction to help you confidently link them.
#1. Log into your Squarespace Account
#2. Go to the page you want to add your sign up bar in
#3. Edit your page
#4. Click the right ‘+’ icon the top right hand side
#5. Scroll down to the MORE section
#6. Click on Newsletter icon and drag it to where you want to add it
#7. Enter in your display details
#8. Click on the second tab Storage. You will the platforms you can connect to. If you can’t click the plug icon on the squarespace campaign and the others should appear.
#9. Click Mailchimp, and link your website to your Mailchimp account my login into Mailchimp as the prompts come up on screen.
#10. Select your list and connect the corresponding fields.
#11. Repeat the above for everywhere you want to add the form on your website.
If you don’t feel confident doing this yourself, then please connect with me and I can assist you.
This website uses cookies to improve your experience. We'll assume you're ok with this, but you can opt-out if you wish. Cookie settingsACCEPT
Privacy & Cookies Policy
Privacy Overview
This website uses cookies to improve your experience while you navigate through the website. Out of these cookies, the cookies that are categorized as necessary are stored on your browser as they are essential for the working of basic functionalities of the website. We also use third-party cookies that help us analyze and understand how you use this website. These cookies will be stored in your browser only with your consent. You also have the option to opt-out of these cookies. But opting out of some of these cookies may have an effect on your browsing experience.
Necessary cookies are absolutely essential for the website to function properly. This category only includes cookies that ensures basic functionalities and security features of the website. These cookies do not store any personal information.
Any cookies that may not be particularly necessary for the website to function and is used specifically to collect user personal data via analytics, ads, other embedded contents are termed as non-necessary cookies. It is mandatory to procure user consent prior to running these cookies on your website.